We moved into our new home and land in February of this year. The day before we moved in our town was covered in a blizzard and we scrambled to find someone to plow our new long driveway.
Only a few weeks after our move we announced our first workshop in the studio that had not been built.
Many thought we were crazy and had no idea why we would put that kind of time and financial pressure on ourselves.
We knew that having our first workshop would motivate us to get it done but in the process would be building ME the studio we had bought this land for in the first place.
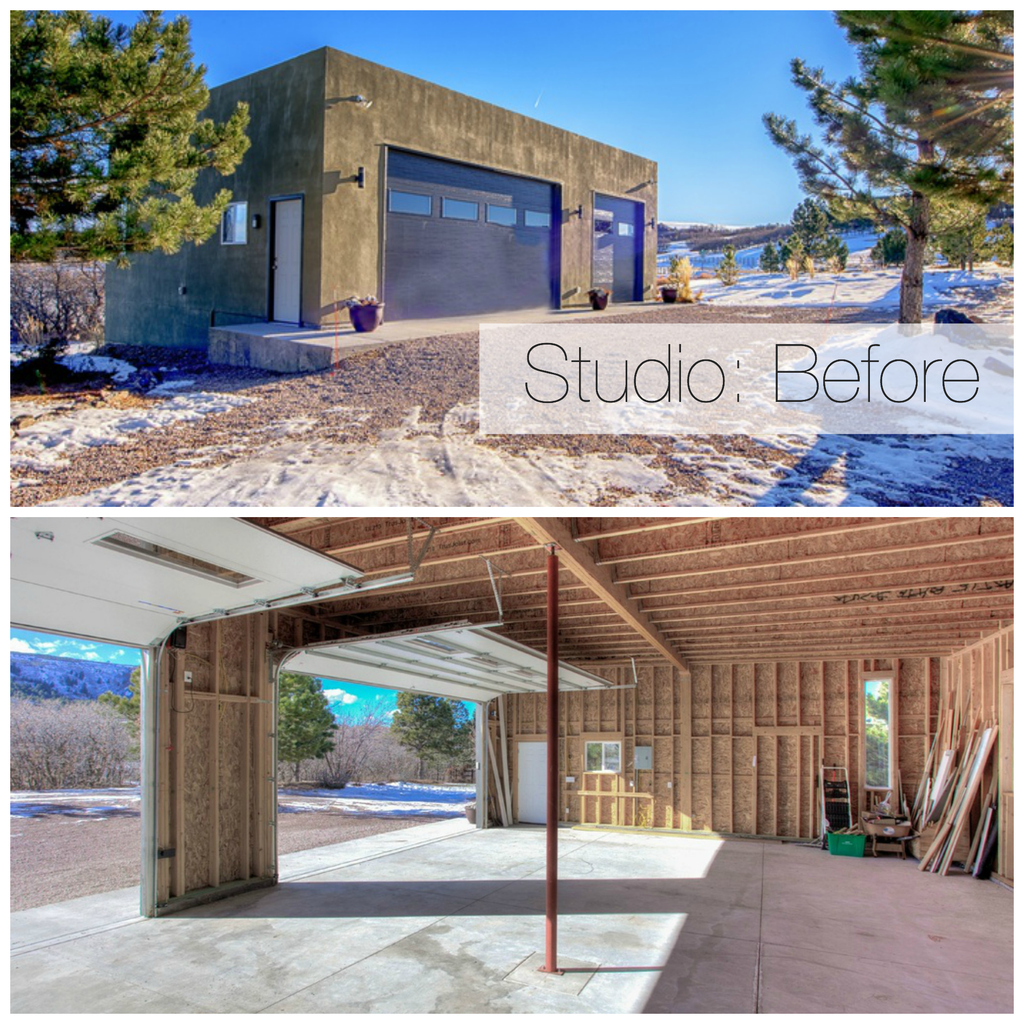
The foundation and structure was already on the property but it was far from being a studio.
I have said over and over that this is the studio that love built and nothing could be closer to the truth.
This studio was built by our children, my husband, my mom, my brother and me. It was more hours and more money than we thought it would take (of course it was).
I had almost weekly emails from friends and customers asking how they could help. I never took them up on the offer but we had genuine and loving offers coming in to do everything from cleaning to painting.
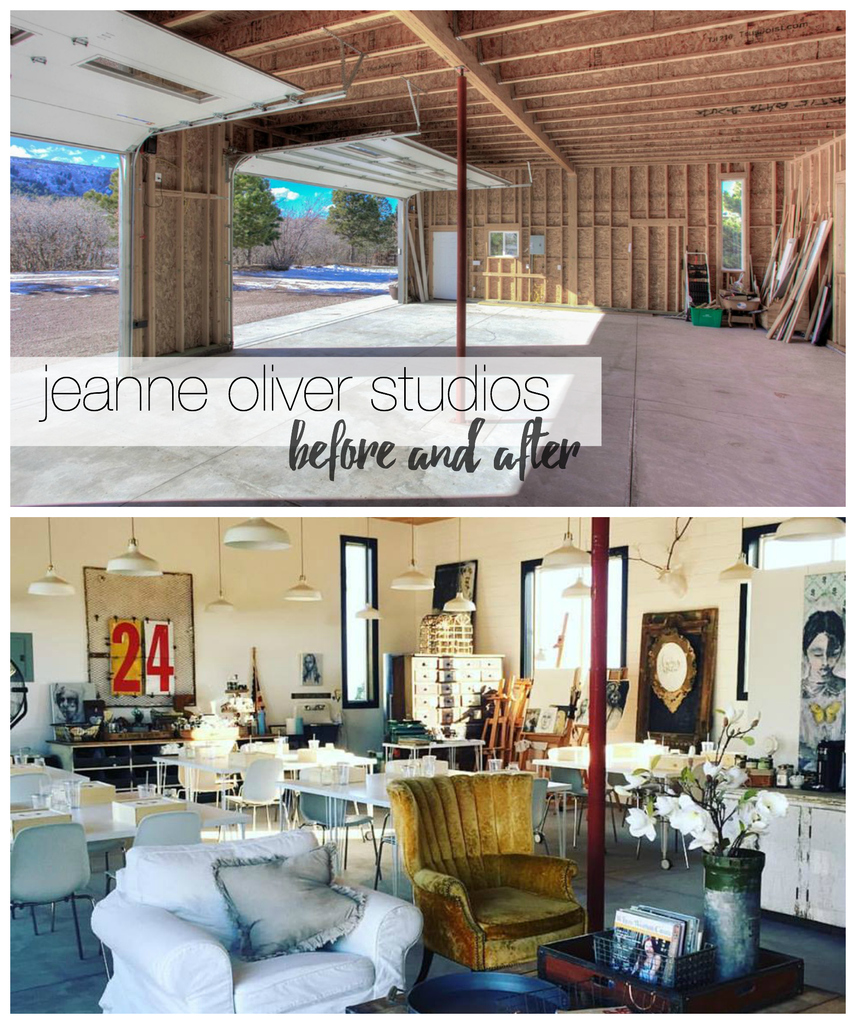
Welcome to the studio that love built…
I am horrible about documenting projects so please bare with me as I probably skip tons of steps. Now you know why I could never be a DIY blogger:-)
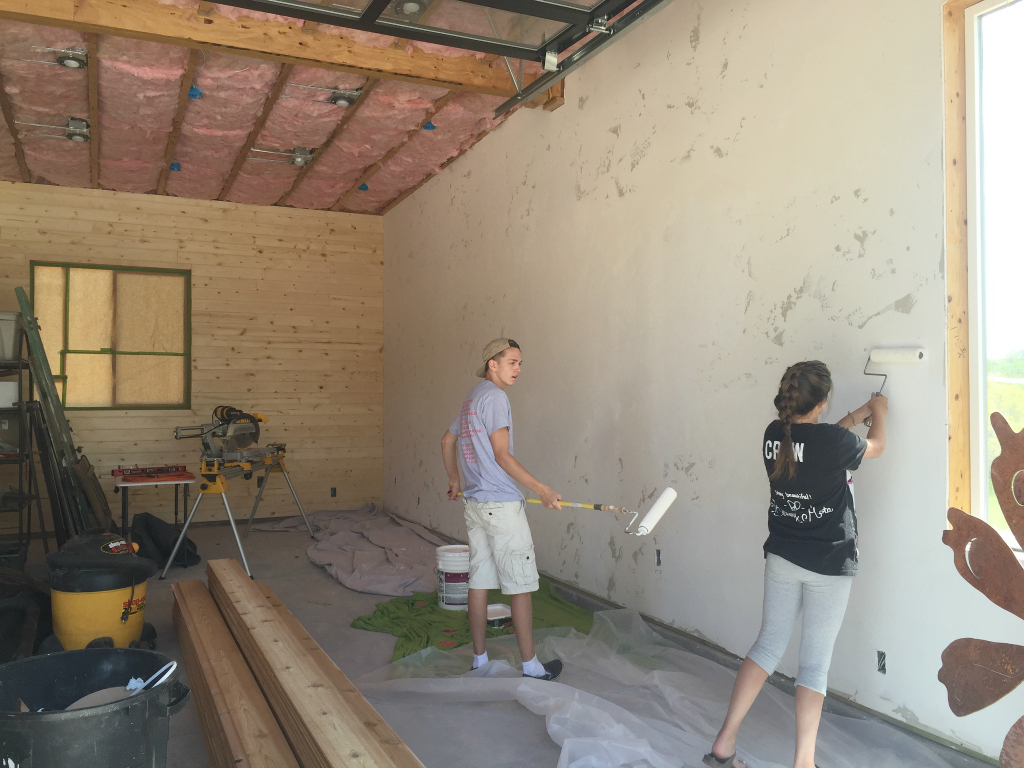
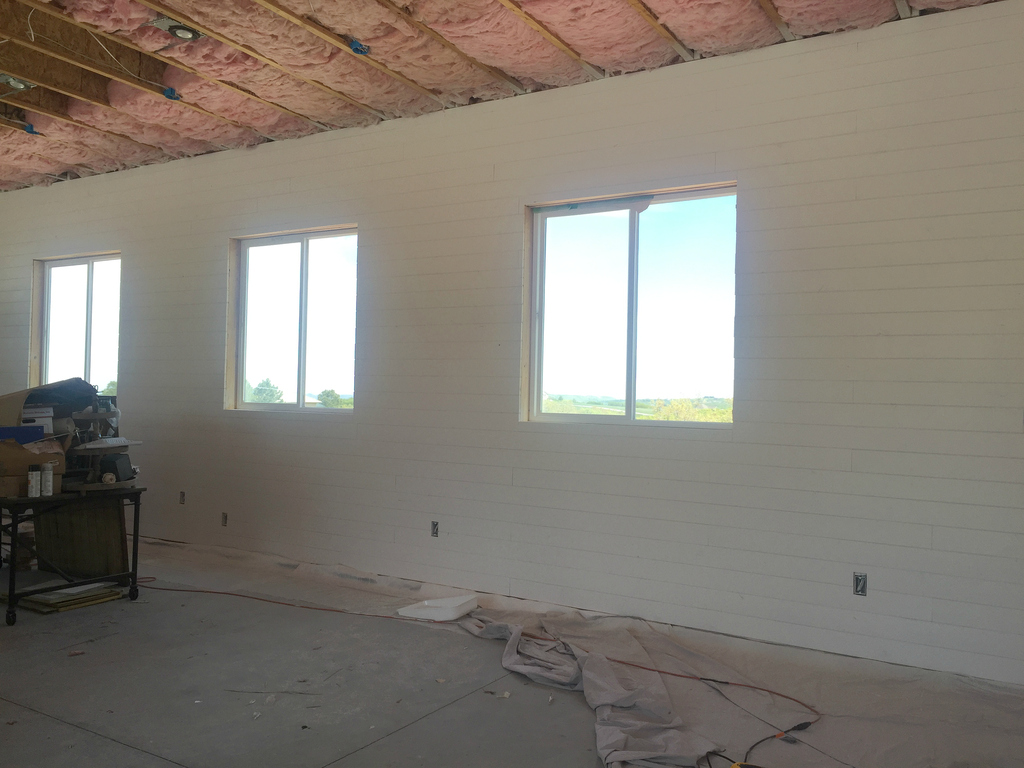
The first thing we did was have the whole studio wired for lighting and baseboard heating if we decided we would need it next winter. We then insulated the whole studio very well to help keep it cooler in the summer and warmer in the winter. Because I knew I wanted some of the wall space to be used to hang canvases for painting we decided to put drywall up on two of the walls and then plank the other two walls in pine.
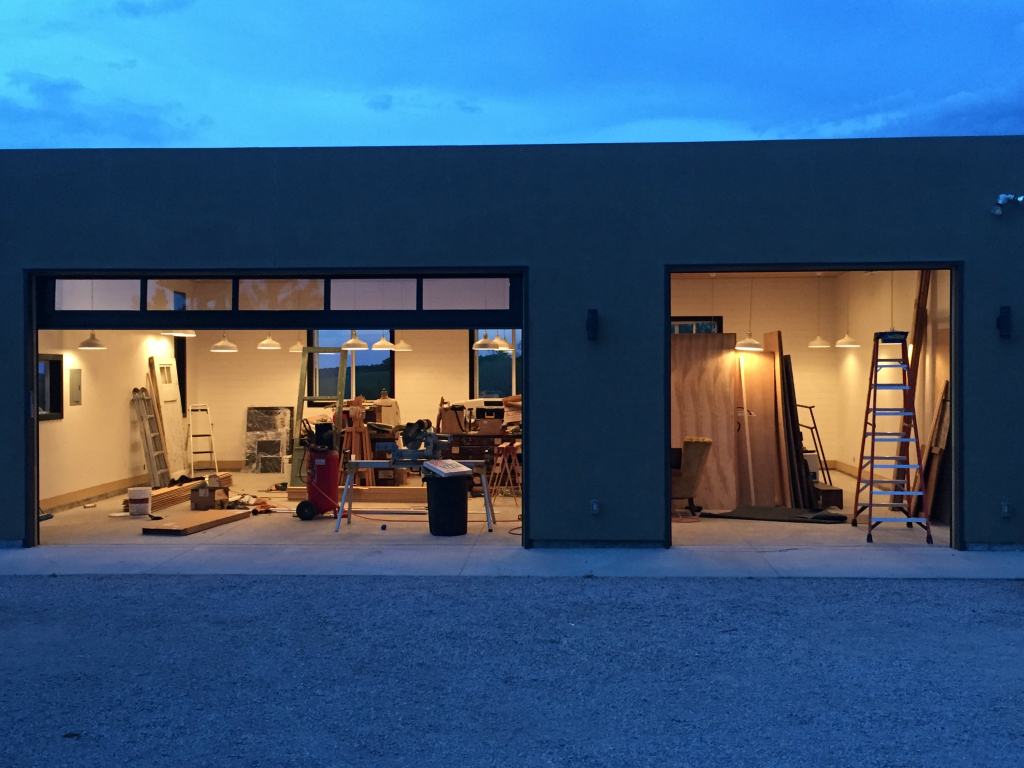
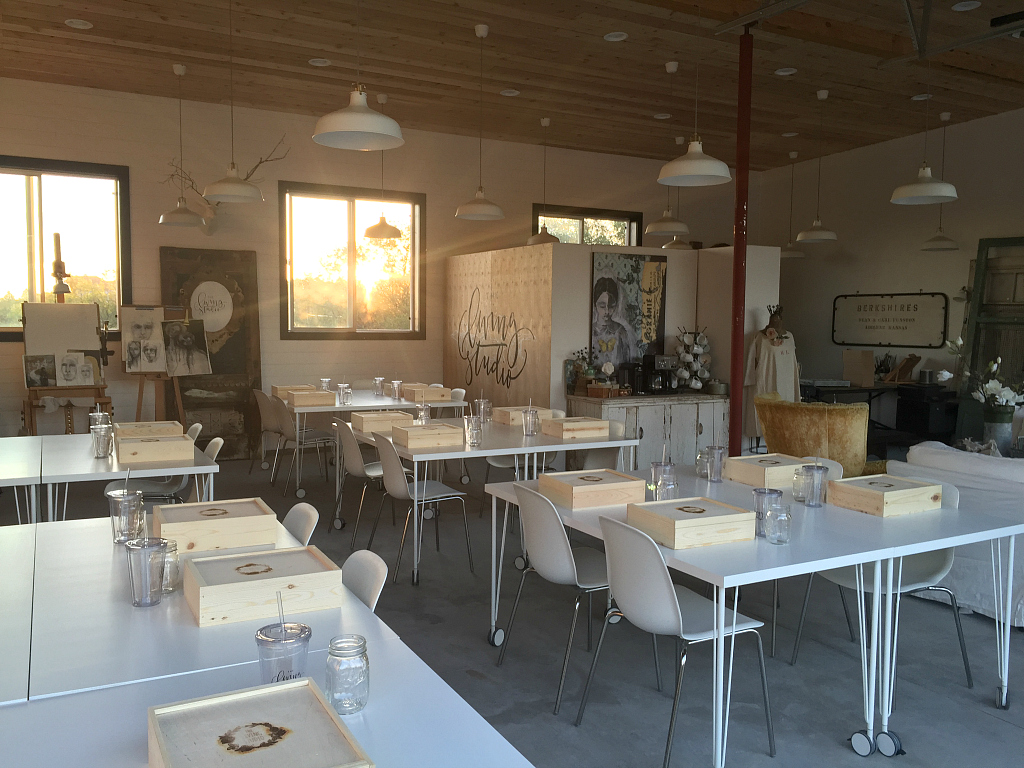
The biggest investment had to be our all view aluminum and glass garage doors. We bought commercial doors so we could have more natural light, enjoy the gorgeous views of the buttes, warm up our space in the winter (we are figuring out how to cool it off in the summer:-)) and to make it feel more like a creative space instead of a workshop or garage.
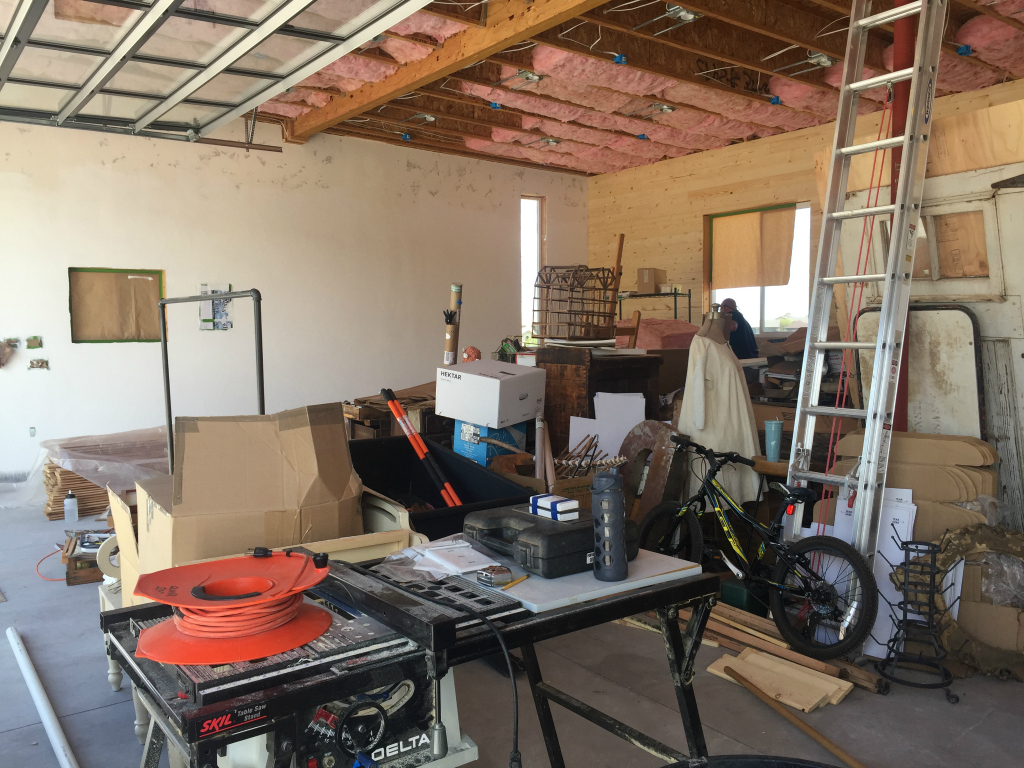
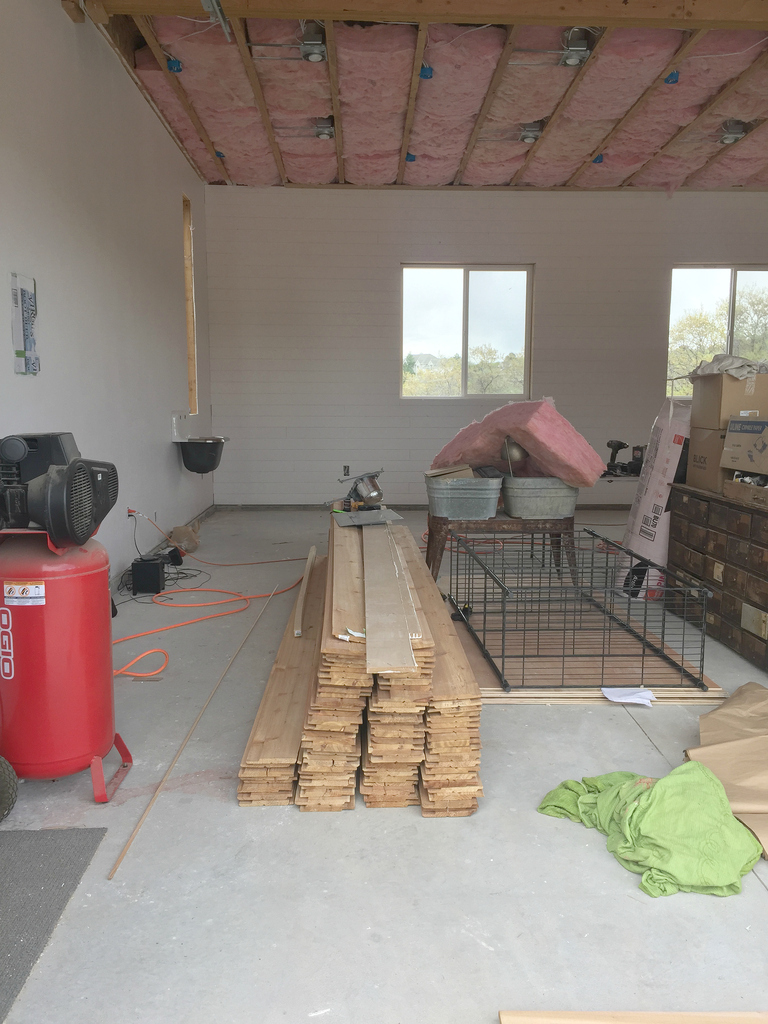
During our move and construction we didn’t have any place else to put the studio furniture etc. so we all had to move around (and often move) piles of furniture, art supplies and tools.
This was not ideal at all but we made it through.
It started to feel like we were really making progress when we started to paint the pine planking on the front and back wall. All of our wood for the walls, ceiling and window frames came from Home Depot.
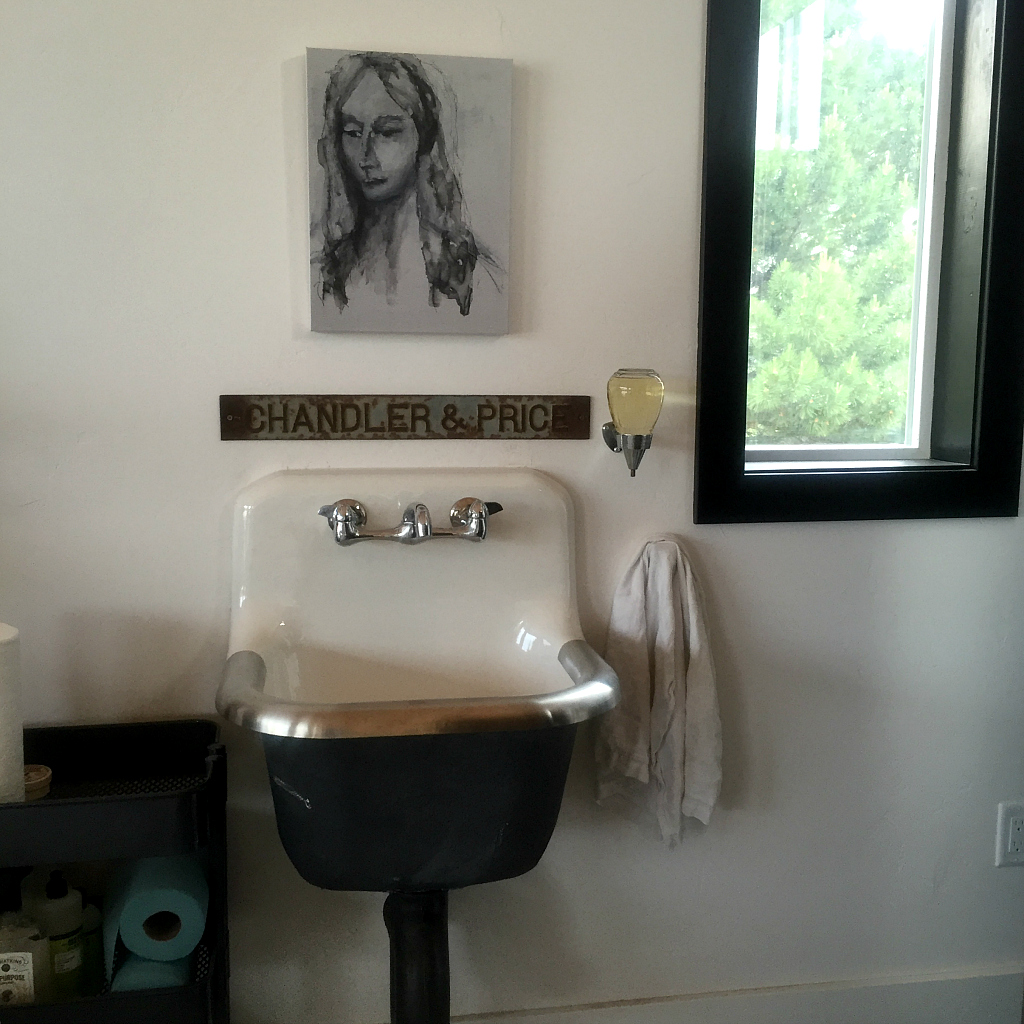
When we had sold our last home we were in the middle of finishing the basement and I had purchased the coolest utility sink for the guest bathroom.
I wasn’t going to leave that behind and I am so glad I kept that because it worked perfectly for our studio sink!
Nothing surprised us as much as how LONG it would take to plank the ceiling with cedar planks! I am not even kidding. My husband said, “We just laid a wooden floor upside down”! Along with that they had to cut out holes for the 44 lights. Some days they would work all day and get five rows done. This was two weeks of full time work by my brother and son. Kelly was able to help after work and on weekends.
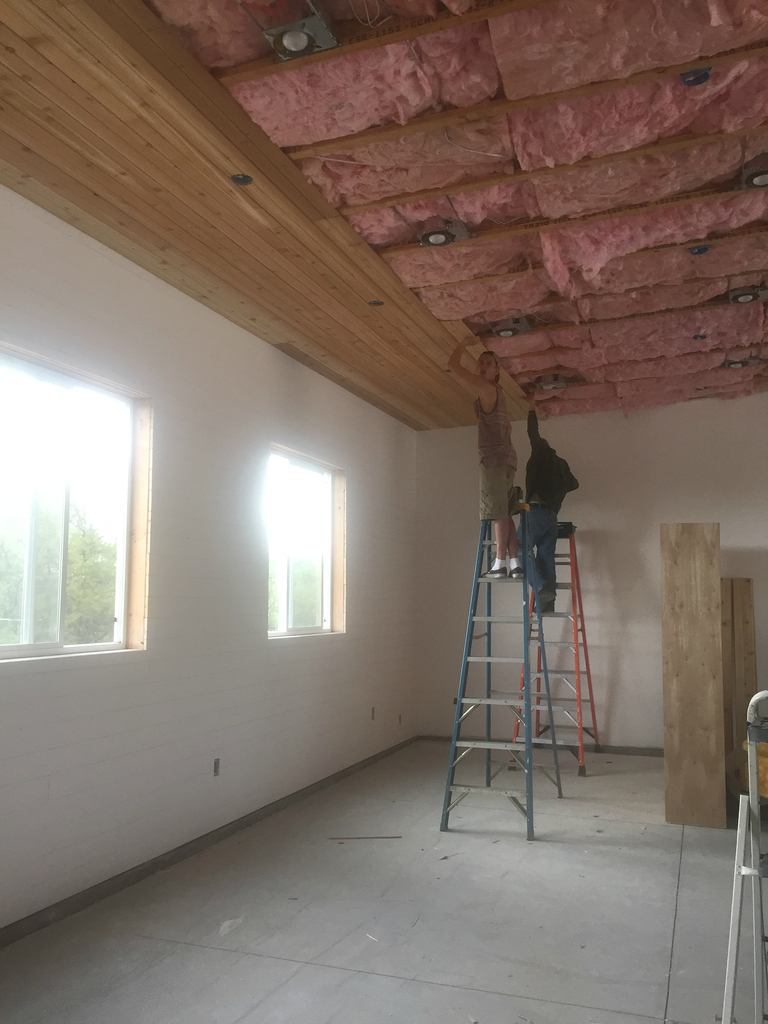
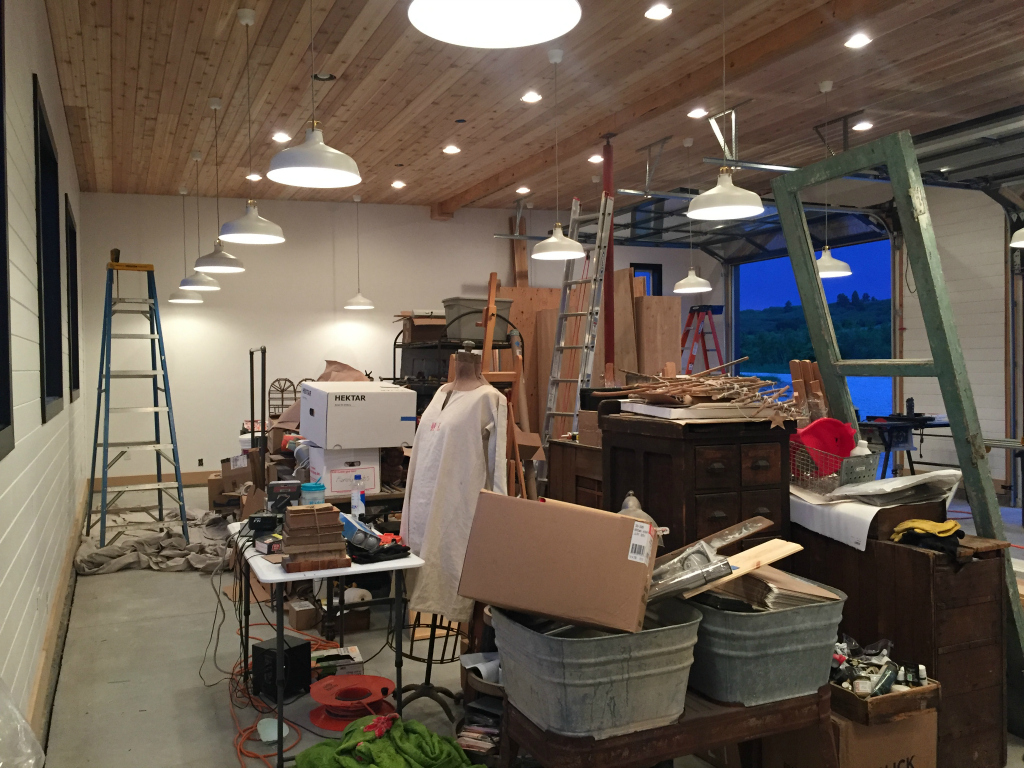
Lights! After the ceiling was completed it was so much fun to see the lights being hung and to see the design of the space coming together.
Right now we were about two weeks out in the photos and there were a few moments of panic that we would not get it complete in time.
My brother built beautiful window frames and I echoed the black window trim that is also in our home.
I did this in both spaces because I love the black metal windows of France and this was the affordable way to replicate the look.
Moments of rest didn’t feel doable until this moment. All of the construction had been completed and now it was up to me to pull it together and create a place I could teach and create.
Because all of our studio furniture and supplies had been around all of the construction we had a few days of just dusting, cleaning off and sweeping.
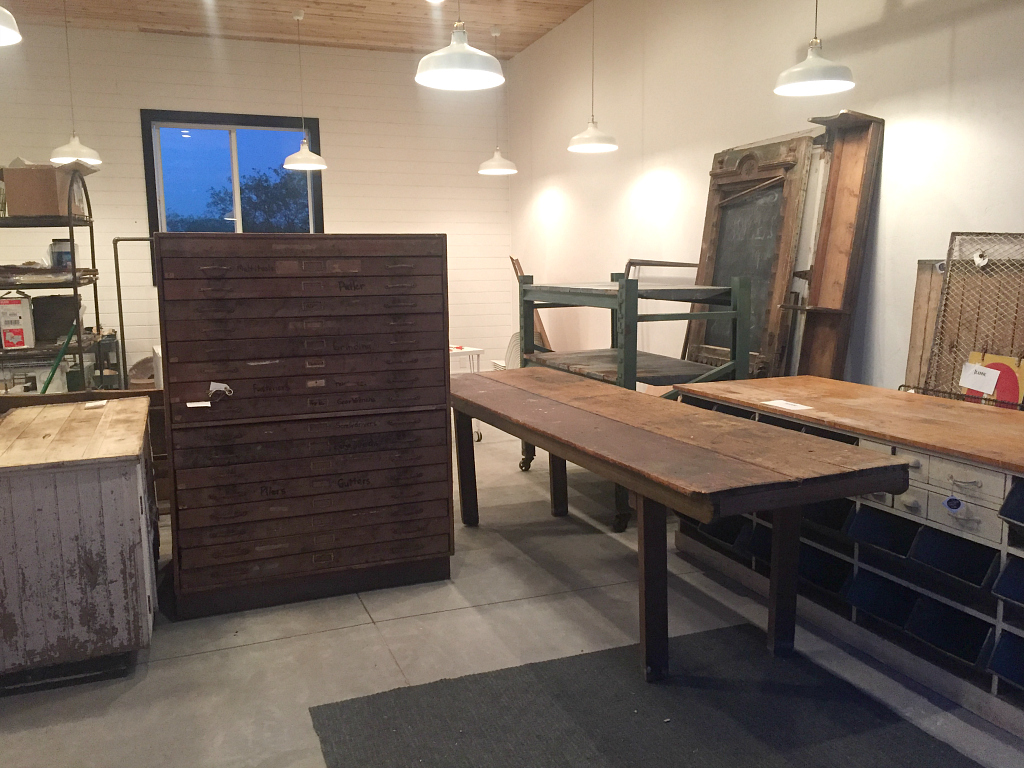
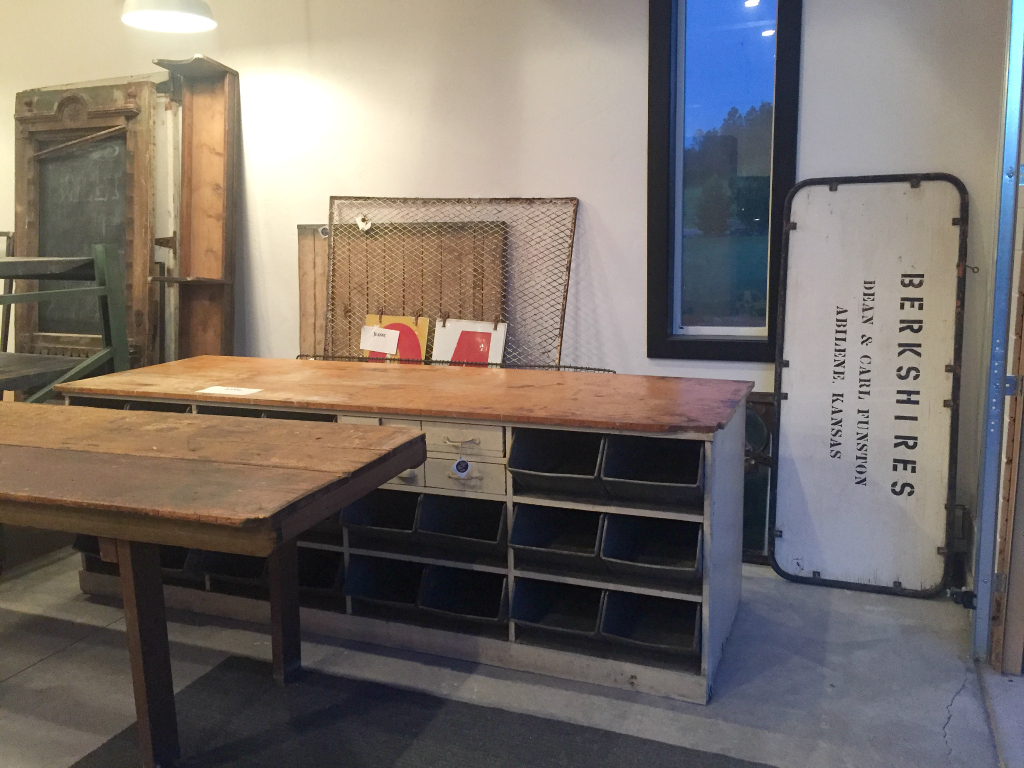
We knew we still needed to get some more furniture and display pieces of furniture and we are so lucky to have Old Glory Antiques in Denver.
Holly and Sandy were incredible to work with (once again) and here is some of the awesome vintage finds we bought from them.
We collapsed a lot those weeks…
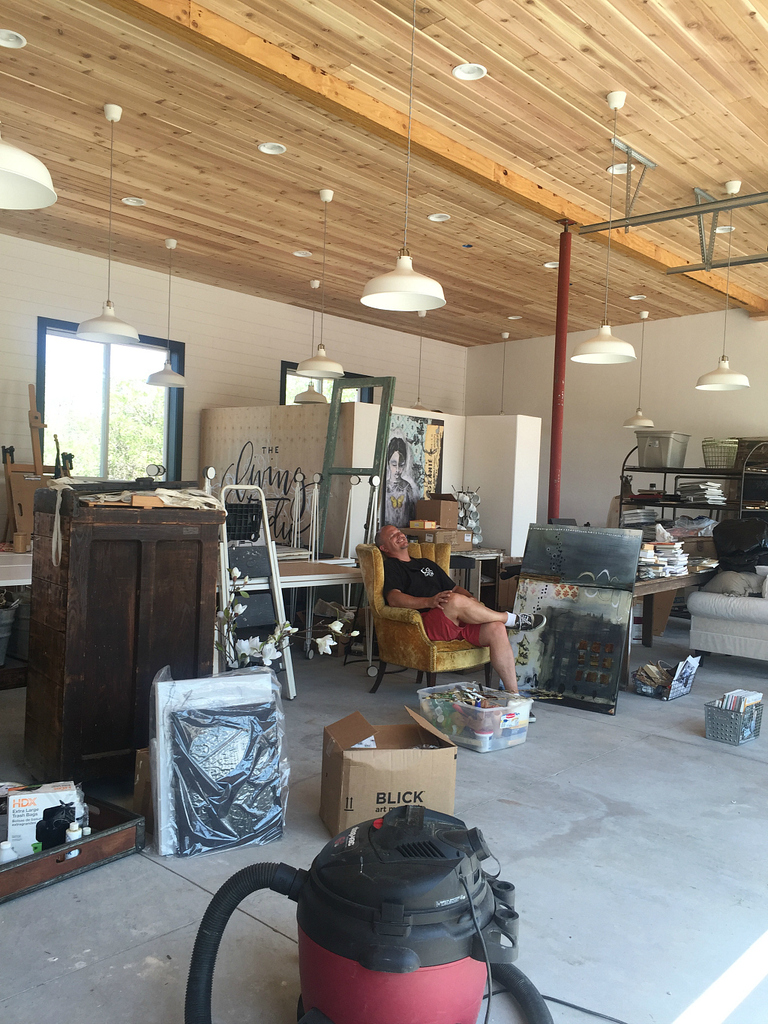
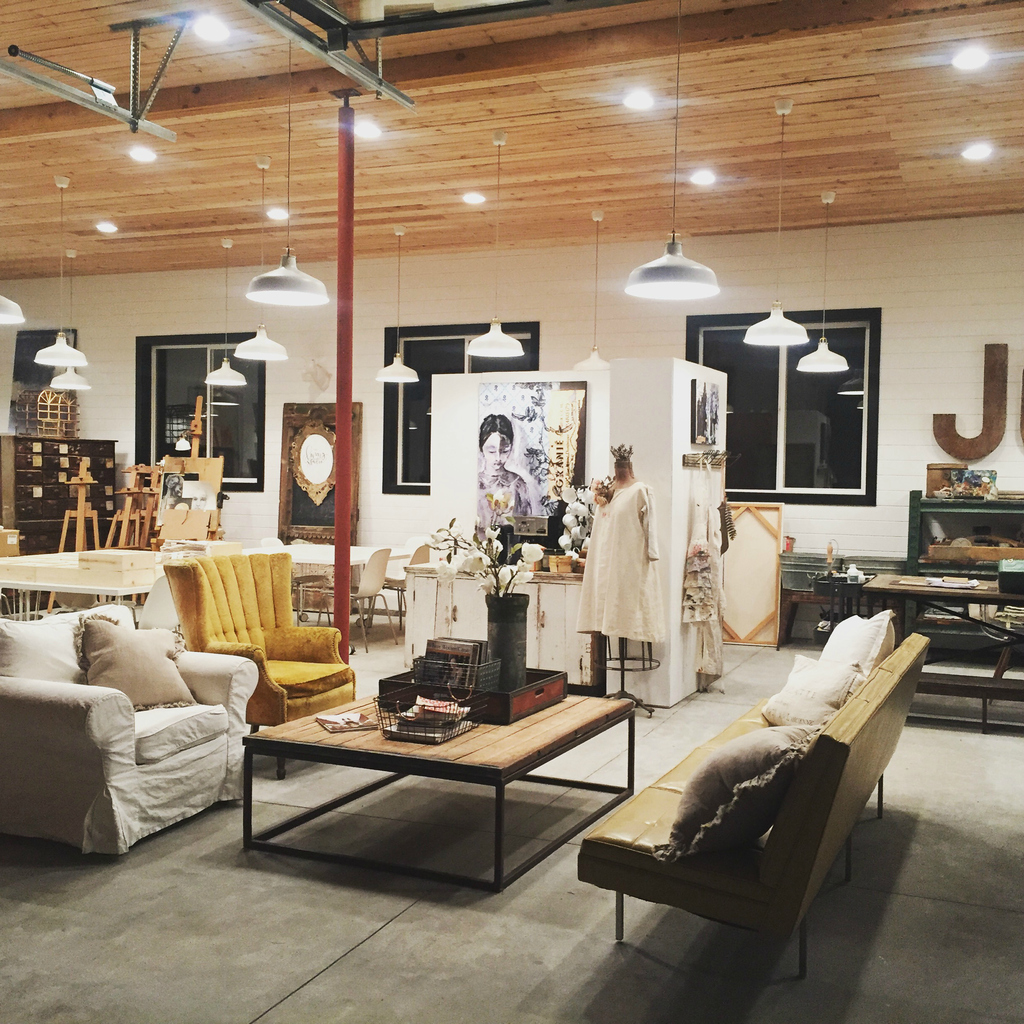
See those awesome portable walls behind a collapsed Kelly? Those can be moved around our space as needed but right now they are hiding all of our shipping supplies. We got this idea from Alisa and Andy Burke. We saw larger versions in their studio a year ago and knew we would implement them someday into our own studio. Thank you Alisa and Andy! You guys are awesome.
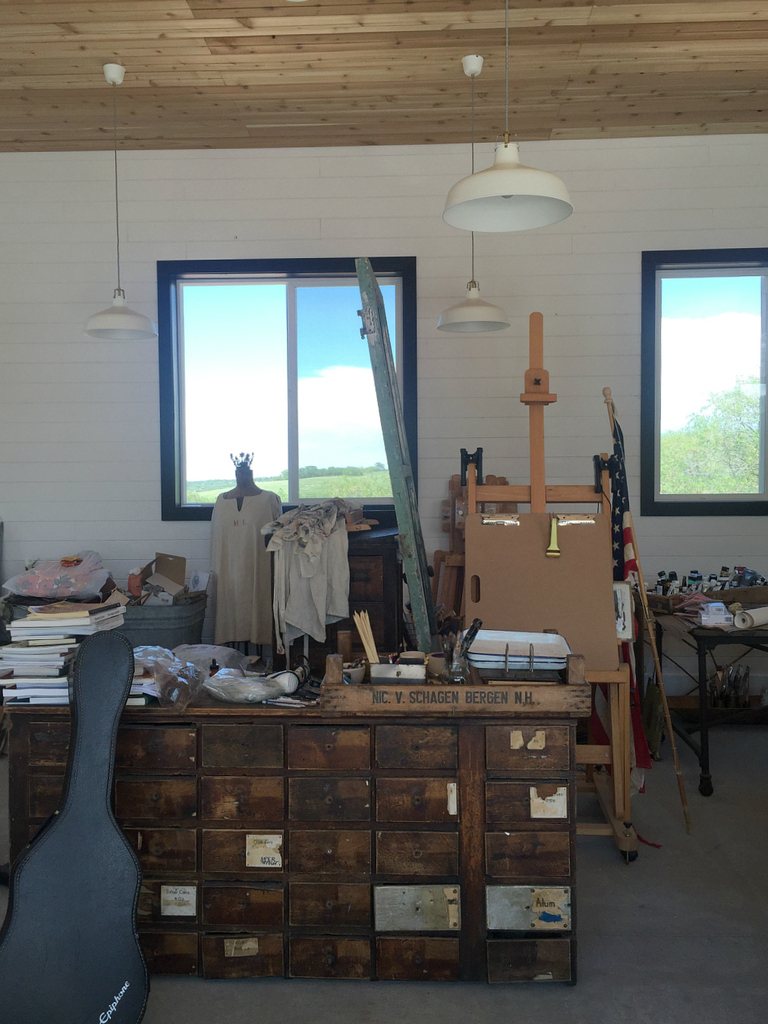
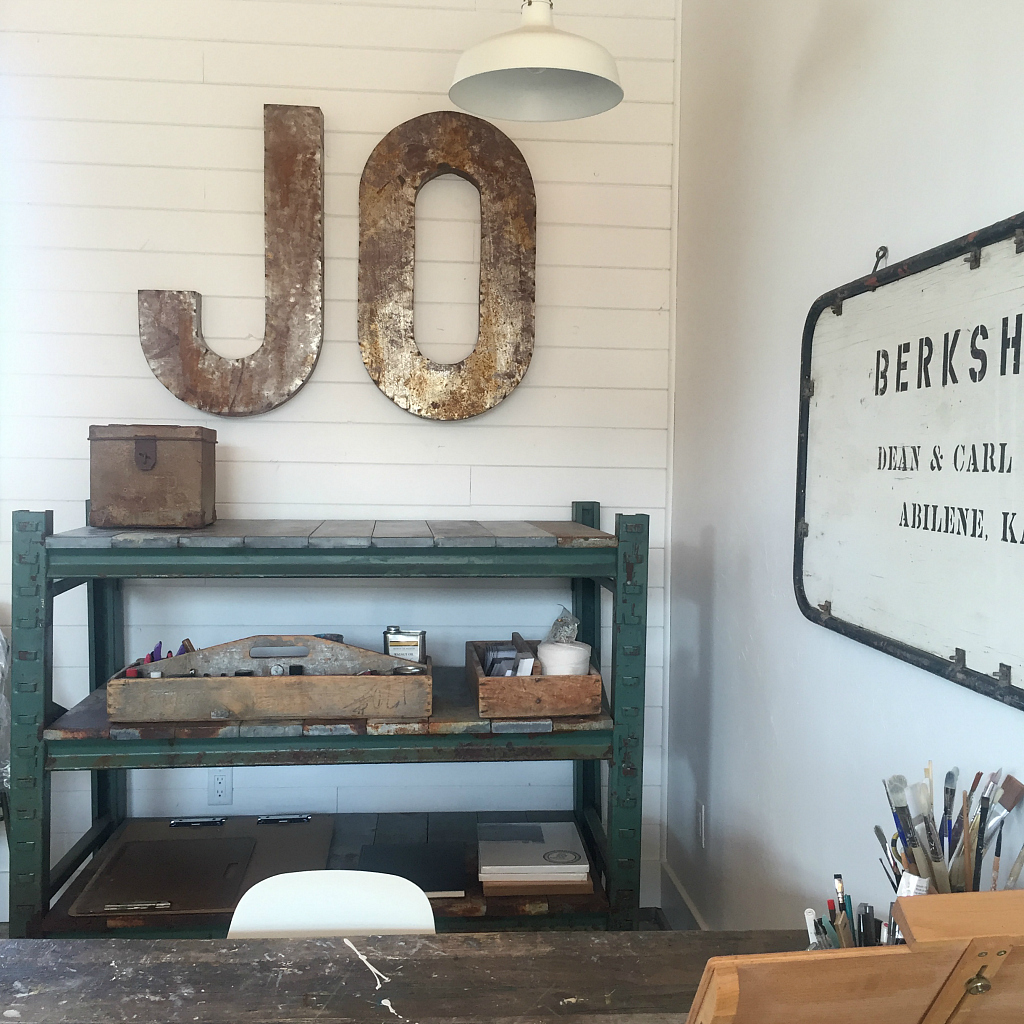
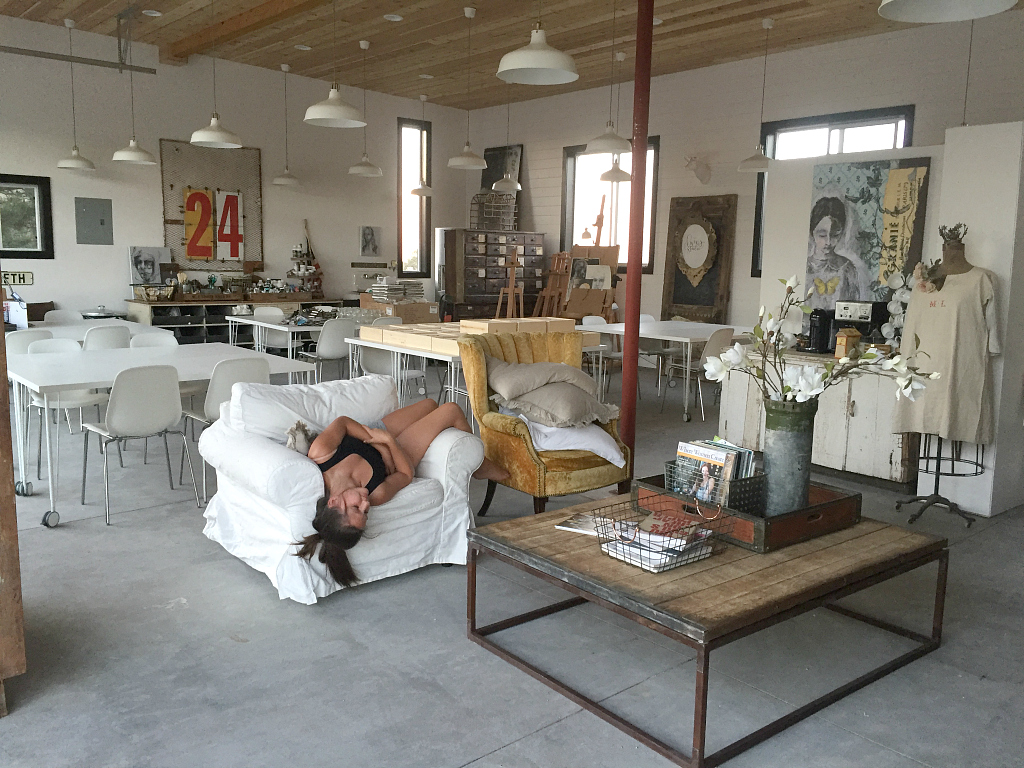
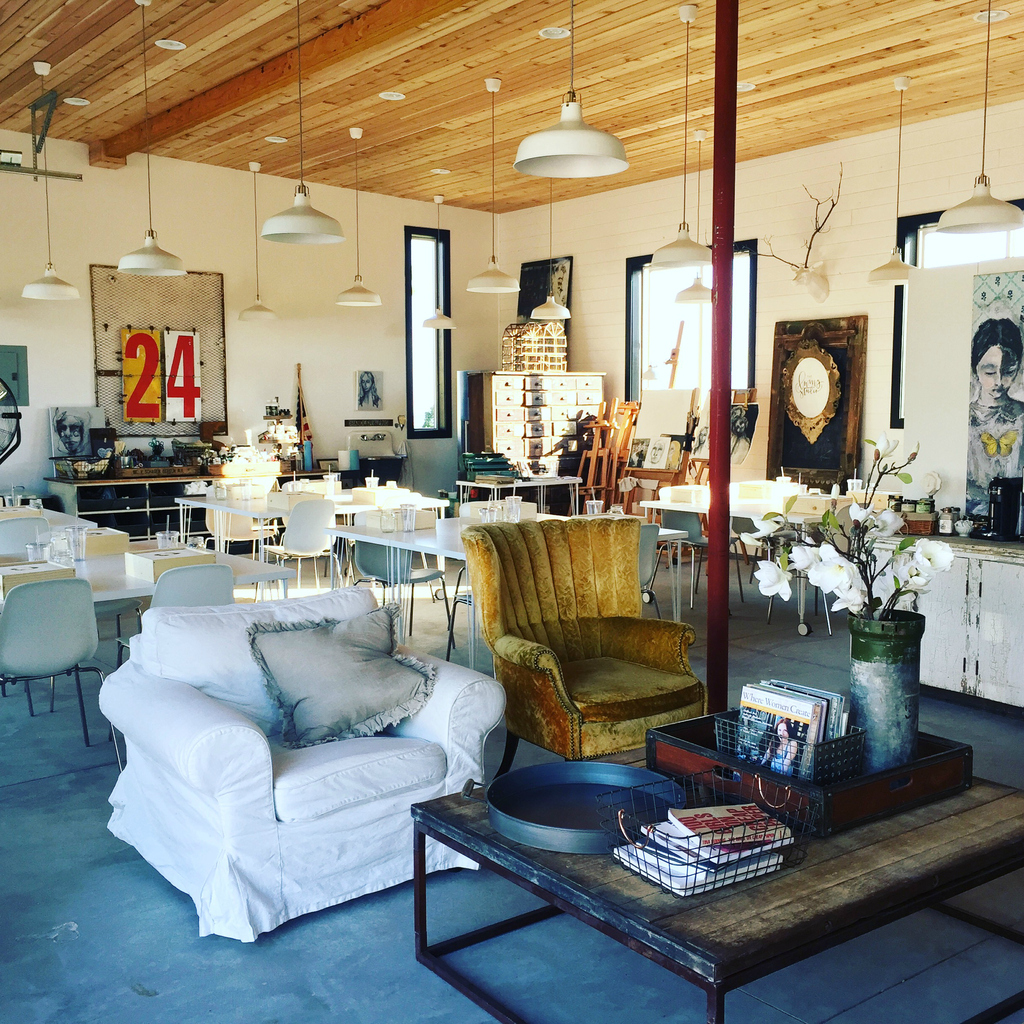
This was the first corner I started working on and I was already falling in love with this new space of mine.
We were only days away at this point. I knew we would pull it together but it was all hands on deck plus a few more!
It is so hard to find good work:-)
It was so much fun to pull my vintage finds together.
Two days away!
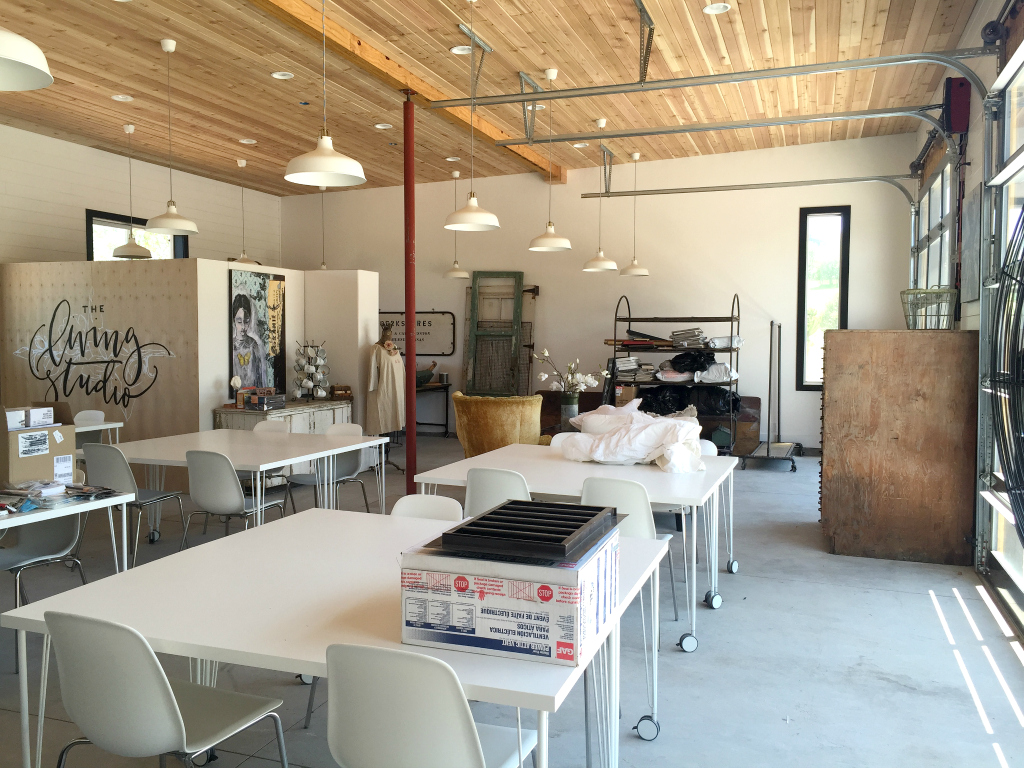
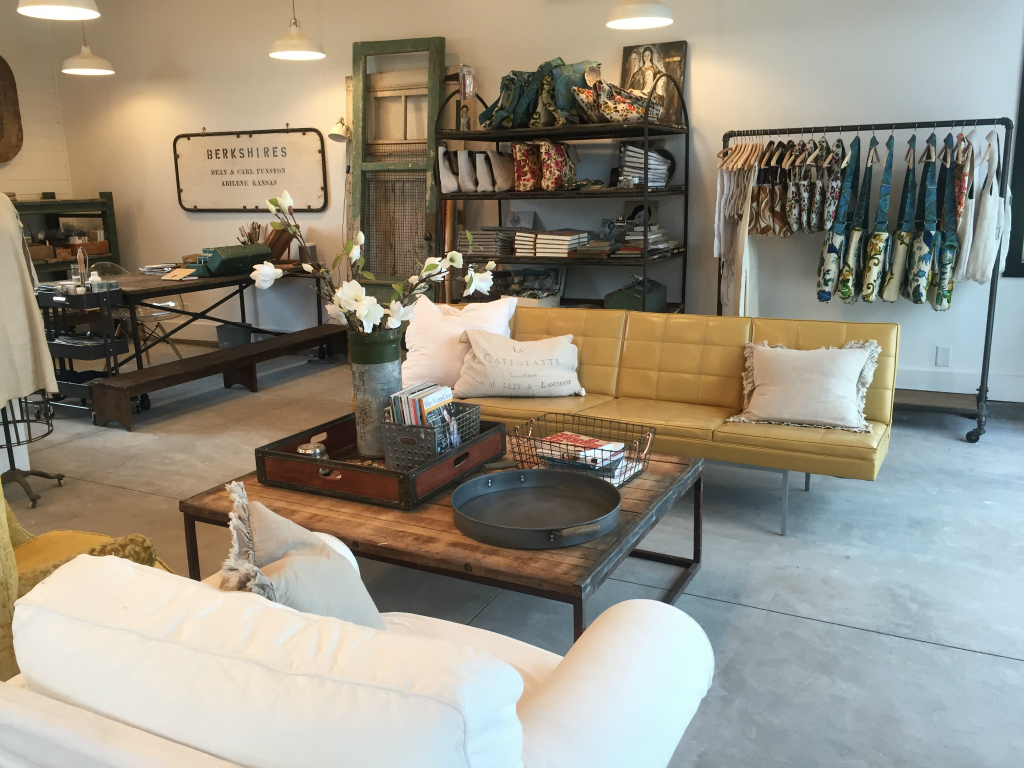
We had been having bags made just for the grand opening! Seeing all of our product blending in with the new studio just pulled the space together.
The display piece was from Dwell Antiques and the clothing rack from Cost Plus World Market.
The chairs and coffee table had been in our last home and we found the awesome mid century couch on Craiglist.
This was the day before our first workshop and we were feeling so good about what had been accomplished!

This was the morning of our first workshop! I was up early to finish up final touches, pray over the women and space and to just take a deep breath.
We had done it! As a whole family we had come together to build something that we knew was bigger than us. Not in a weird way but in a special way of knowing this would be a place to create and a place to gather.
That this place was just not for me, not just for my family but a place for so many that we do not even see the full picture yet.
The studio that love built!
******
I am sure you have questions about sources or about our choices. Please leave your questions here and I will do my best to answer them.
I always love to see a good before and after and this is beautiful Jeanne. You have created a beautiful space and I love the antique pieces you incorporated into your design.
Thank you so much! We are so glad to be done and be in the studio making art!
AMAZING!!!
Thank you so much!
So inspirational and artistic Jeanne, kudos to you and your family for pulling it all together. Your new space looks like something from a fabulous art magazine. I hope to come and see it for myself someday.
Thank you so much! I hope you come and create with me!
Truly a beautiful place. And beautiful that your family worked (their tails off) together to get it done! Whew!
Thank you and we are so relieved it is DONE!!!
Oh Jeanne – It’s beautiful!!! What an incredible space to create in! Definitely on my bucket list!
Thank you so much and I would love to have you come to the studio!
I love how you decorated this incredible space. The choices that you made as to what to include are inspirational. Thank you for sharing this with us your sweetness is appreciated.I was wondering where you got the white tables and chairs that are used by participants during your workshops?
Thank you so much. I love creating spaces to live and create in. All of the white tables and chairs are from IKEA. The drop lighting is also IKEA.
I love all of your choices! So clean and pretty and vintage-y and modern all at the same time.
Thank you! That is exactly what I was going for and how I like to decorate.
What a thrill to drive up and see it for the first time. I am so grateful to have been a part of the first workshop offered in this lovely and welcoming space. You so pampered us.
I can’t even imagine that weekend without you being there! I hope you come back!!!
A stunning outcome and one that I am sure makes your heart sing each time you walk in!
Thank you! It truly does!
Oh my gosh!! It is FABULOUS!!
Thank you so much! We are all enjoying it so much!
Jeanne thank you so much for sharing your beautiful studio with all of us. You must be so happy! What a dream come true. I love that I was a family project and you can all take pride in your accomplishment. Can’t wait to see a tour of your house next!
do
jeanne
Colorado! What a beautiful state to make memories (and ART) in. I cherish the ‘chapters of my book of life’ that were spent in Evergreen and Denver with our daughters when they were young. Many blessings to you and family for sweet years ahead. We still have lots of friends in Colorado and someday I will indeed make it to one of your fun classes! XOXO, Frannie
This is SOOOO neat! The studio is so light-filled and lovely, but your story and your art make it just delightfully rich! (The good, REAL-kind -of-rich!). God’s blessing to you on years of spirit-filled art gatherings…a.k.a.: “communion”! You’re going to have so much fun! Cheers!
Elizabeth Cecchettini
Just curious . . . what are the boxes on the tables and what do they hold?
Those are the boxes we gave each woman that came for our first workshop. They were each branded with “The Living Studio” and were filled with art supplies and a few gifts from sweet sponsors.
Thanks for telling the story of how your studio came together. So much love and passion behind the final outcome….inspiring! I love that if reflects who you are. I pray a blessing over every person who enters this space – fill them with courageous creativity!
What a dream come true! It’s beautiful. The vintage pieces rock! I love the old door with the scalloped edges converted into a chalk board. What an awesome space to create.
LOVE IT!!! You and your family did an amazing job! SO thankful for you and pray that you will continue to inspire and encourage! You’re a blessing to so many!
Oh Jeanne, this is so lovely! What a transformation – a dream realised! May they be lots of creative juices flow through this beautiful space and may all be blessed within its walls. I wish I lived in the US! I would be over there in a flash! God Bless you all and have fun!!
This is just too amazing for words.
What a gorgeous space you created. Congratulations and may you enjoy many creative years there.
Wow! Just gorgeous!!
Wow, love how your studio turned out! The vintage pieces are amazing. The view around the studio is spectacular too. I wish I lived next door. Congratulations!!
Wow, truly a lobour of love!! I adore how it turned out, amazing what a wonderful space!! It truly looks like something from an art magazine!! What a wonderful creative space!! Love the attenton to detail!
You inspire so many. The studio is awesome. I love it because of the blend of the new and the old…almost as though it is part of the landscape and has been there for a long, long time. Beautiful story and studio. I do hope to be there sometime next year!!
Awesome! I have been waiting for this post, you and your family should be so proud! It is such an inspiring and creative space, Congratulations!!
WOW! It is stunningly beautiful! What a magical, inspiring place you have created. I love that your entire family was involved. My sister in law lives in the area so I hope to visit some day for a class – maybe next summer! Enjoy all your hard work and seeing how God can take a dream and make it reality and thank you for being willing to share heart from throughout the process.
Beautiful Studio Jeanne. Love everything about it. I am sure you will spend many happy hours there creating.
Simply amazing. Congratulations on a beautiful space that love built.
What fun!!! Love the glass garage doors, the lighting, and the overall feel seems really “you”. Wish I was closer to attend a workshop in person (saving up for someday!) but in the meantime enjoying Jen’s writing class and about to sign up for the jewelry soldering!!!
Mid century mixed with rustic vintage, golds, grey, aged green… like the palette of your art and Colorado’s landscape. It’s all captivating! Really want to be attend a weekend workshop that you teach. Looking forward to next week’s online Abstract Painting course too.
Just so stunningly beautiful! What an inspiring place to create and just be still. Congratulations on your beautiful studio! Somerset Studios will have to do another piece on you for their Where Women Create magazine. 🙂
That would be amazing!
it’s beautiful! what a wonderful place to create in~
Love this! Also a dream of mine! Those boxes in the last photo are great with the burnt living studio stamp on it. Where these for the women in the workshop? What was in them?
The boxes were branded with The Living Studio and each box had art supplies and some gifts from our sponsors.
Wow, what a beautiful space to create and hang out in! So happy for you & your family on this next chapter of your lives! I hope someday to come to Colorado to attend one of your workshops!
This is absolutely amazing! Congrats! I love to see success like this!
Absolutely stunning! So happy for you and can hardly wait to come for a workshop!!
xoxo?
It looks so cozy! It’s a very charming space!
wow. just wowl
What an amazing transformation!! Love it!
~Marcy
What an incredible adventure. Patience and love. You have made a most-wonderful home and studio space. Congratulations!
Hello Jeanne… I’ve just looked at these lovely photos of your gorgeous amazing studio and am so inspired! I live on 5 acres of wooded property in the Pacific Northwest and one day hope and dream of building my own studio! I was wondering what size (Length x width) your studio is? Thank you as always for your generosity and all your creativity… beautiful! 💚
I love the PNW! My studio is 30′ x 40′. 1200 square feet.