When we made the decision to rip out our existing island we had planned on paying a contractor to do the work.
What did we know and how could we take on a project this big?
We knew we didn’t want what we had but where would we even begin to pick out the insides of the cabinets and basic design?
As we were walking through IKEA one night we both stopped in our tracks and were really looking at some of their island designs.
We didn’t want what IKEA was selling for our island but it allowed us to think outside the box and to realize we could piece together the cabinets that would make our ideal island.
With a little puzzle work, a brother that did electrical and plumping, a husband that dabbles in woodworking and a wife that would do the painting…we were on our way.
All resources are listed at the end.
If you have any questions please feel free to ask in the comment section.
{I don’t think of documenting projects until the last minute so forgive the photo quality}
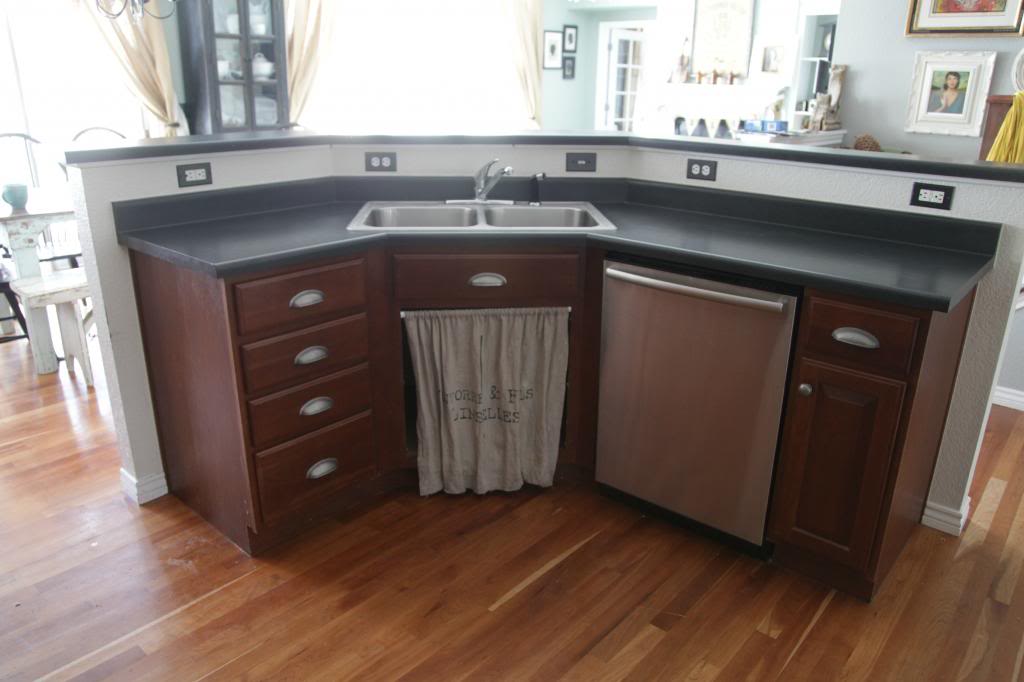
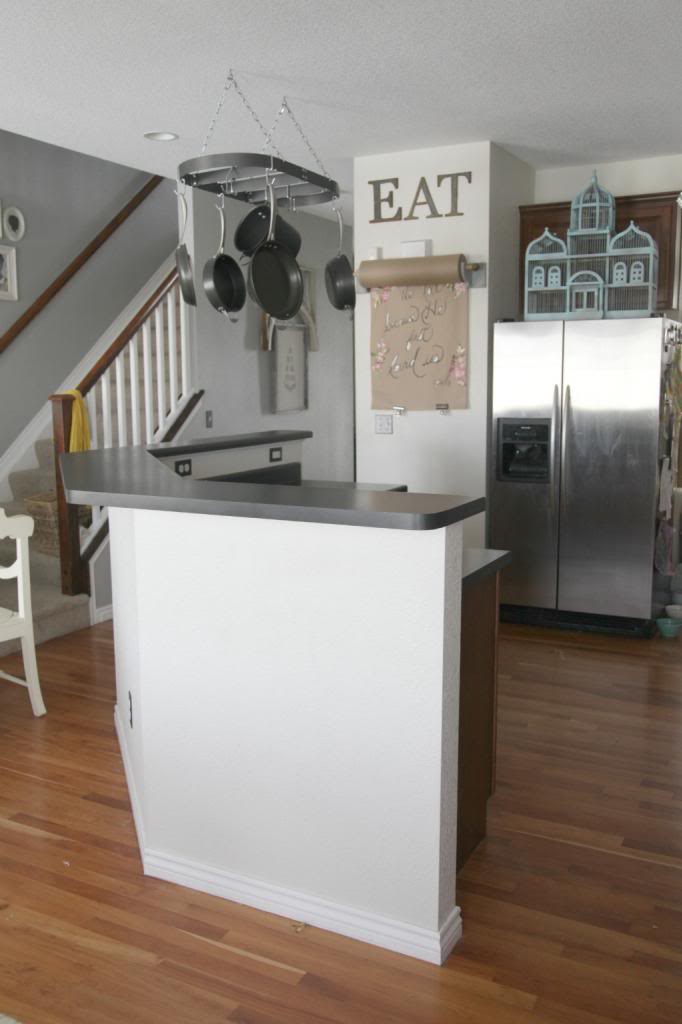
{BEFORE}
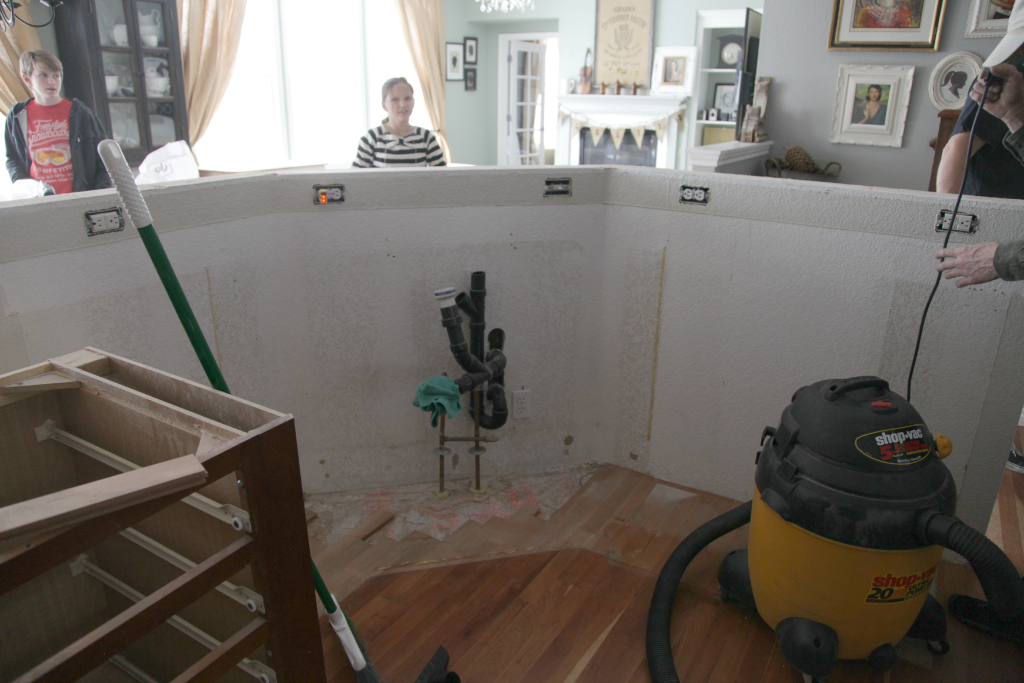
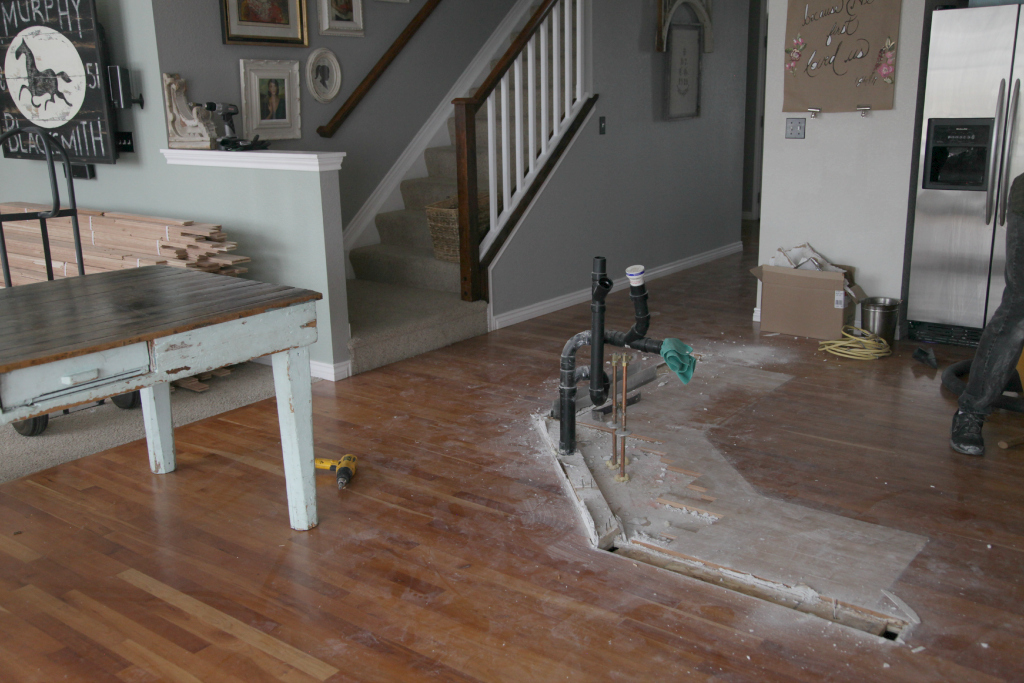
{THE DEMO}
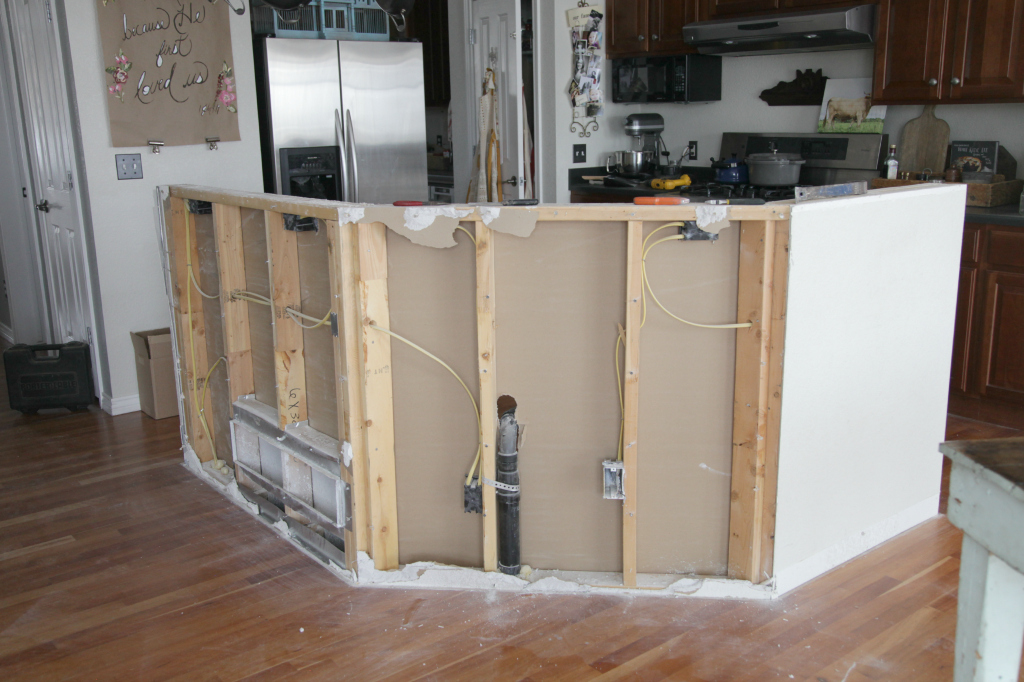

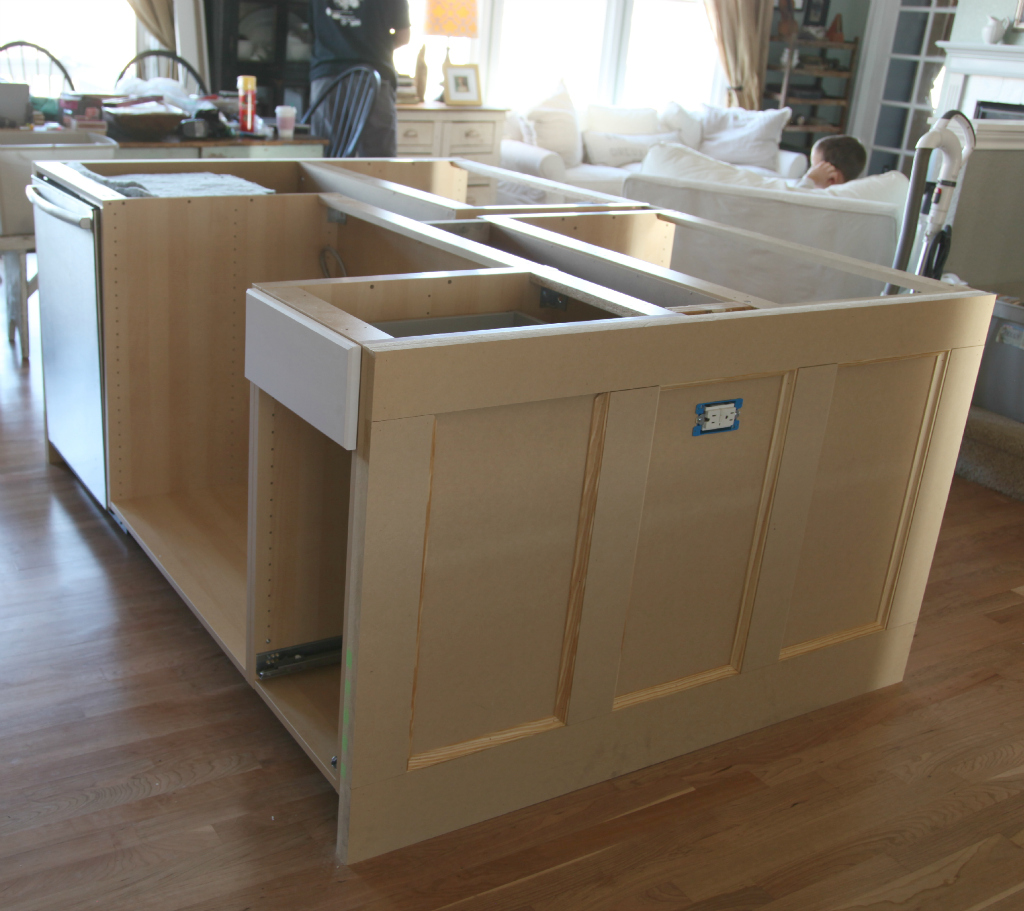
{BUILDING THE ISLAND}
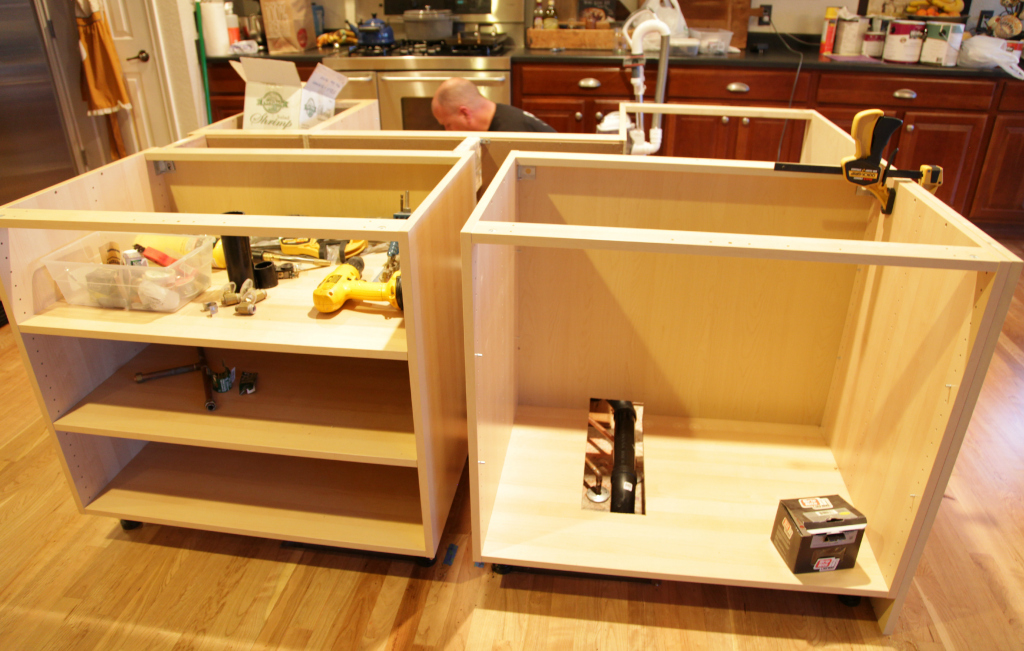
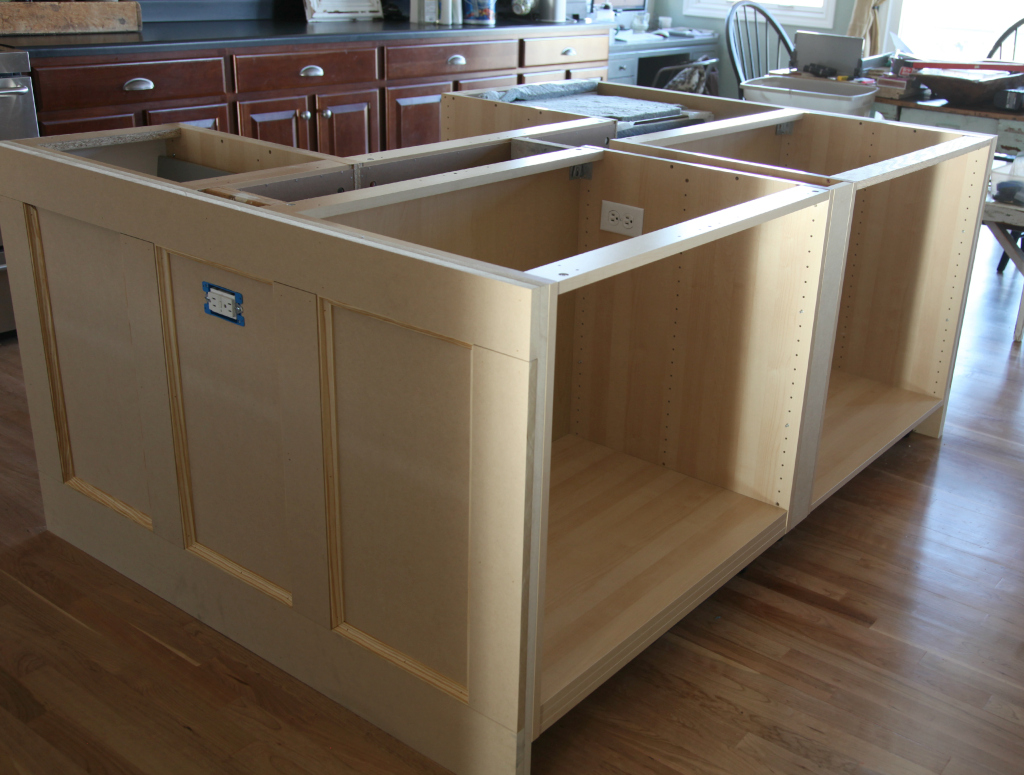
We purchased different size cabinets that would allow us to have two large cabinets on one side, cabinets under the sink, sink mount (we bought our sink also at IKEA) and a smaller drawer and cabinet to the right of the sink.
We knew we wanted to have the freedom to paint the cabinets over and over if needed so we chose the white unfinished wood cabinets.
As you can see we have gaps around the cabinets because we needed to space them out to create the island size we really desired.
We did the best we could to take advantage of the spaces between the cabinets and to make sure we had charging stations and all the outlets we could need.
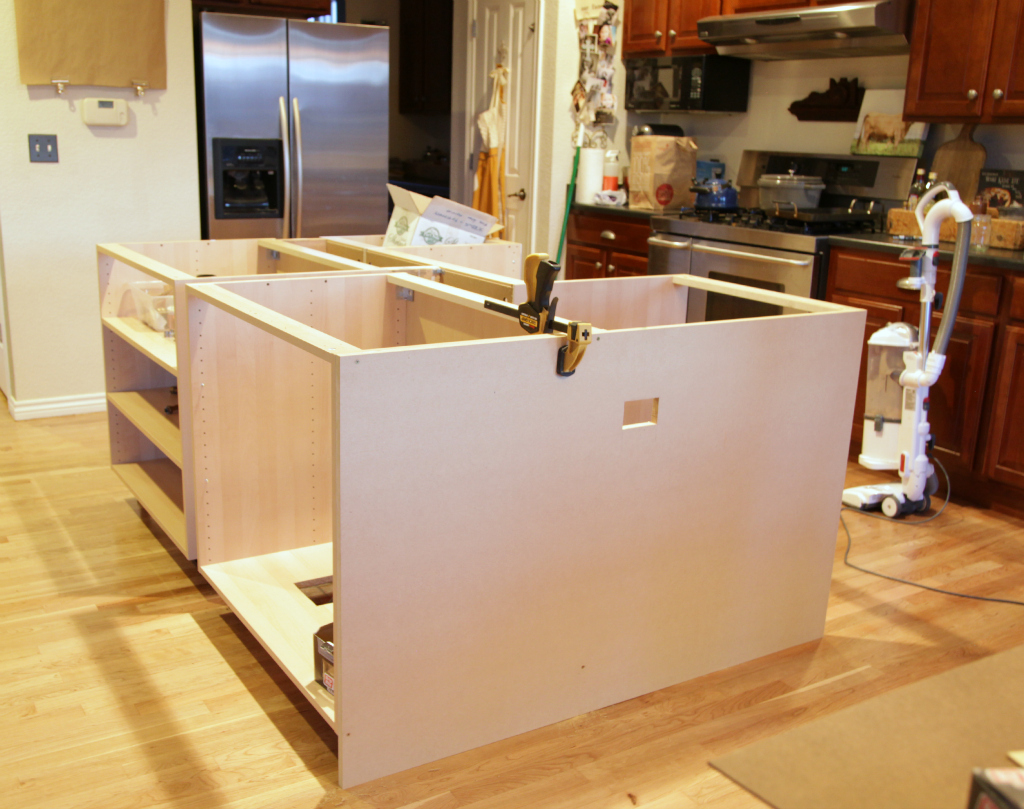
On each side of the cabinets we attached 3/4″ MDF to build our custom wainscoting and pull the cabinet space together.
This was very important to me to include the custom woodwork and create an island that looked more like a furniture piece and to also incorporate the design elements that are throughout the house.
Anywhere we had gaps between the cabinet we included MDF to close the space.
Kelly was able to use the larger gap between the two larger cabinets to hide our Wi-Fi access point. The wood panel is removable using speaker grill fastners. Pretty clever!
These cabinets also were wired for our charging station, printer and microwave.
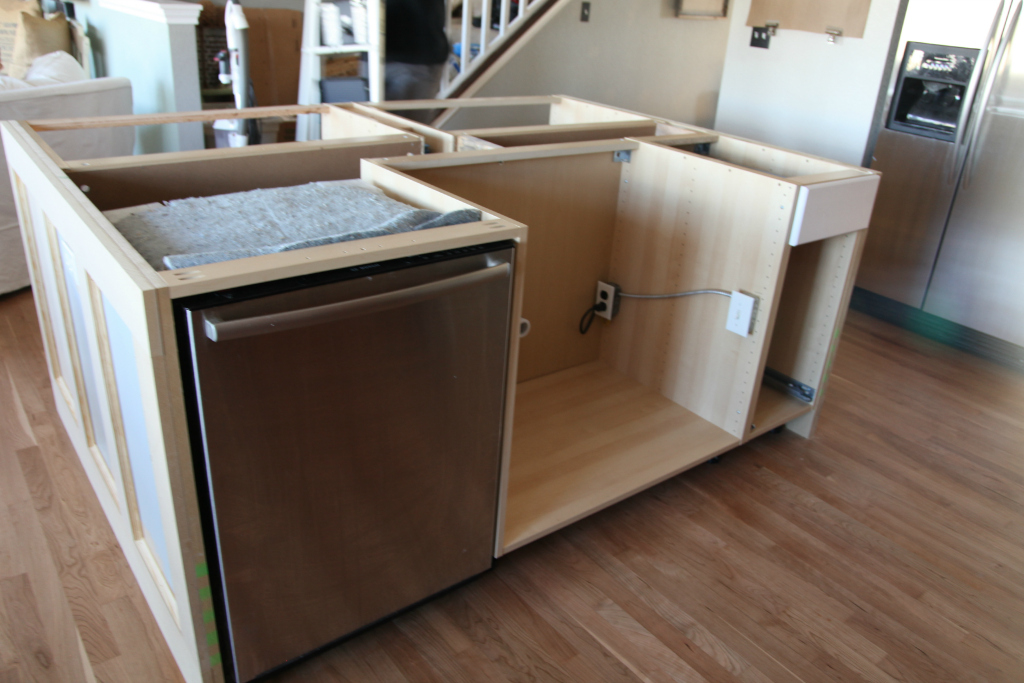
From this angle you can see all the spacing that is still visible from the top but all along the sides it had now been closed in.
Kelly and my brother were able to do all of the electrical and plumbing which saved us on money and time because we were often working on the island late at night.
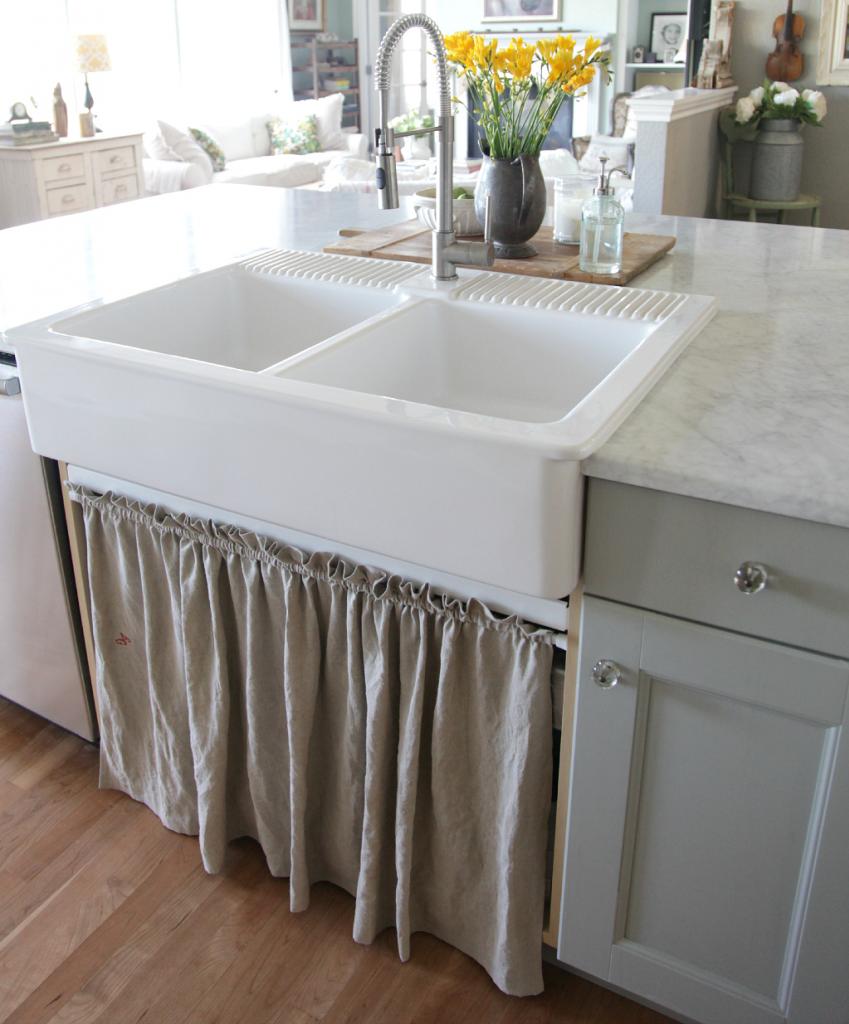
We installed the garbage disposal switch under the sink because we didn’t want to have a hole cut in the marble counter top. I am still not sure I like it there but I can’t say I would love it on the counter either.
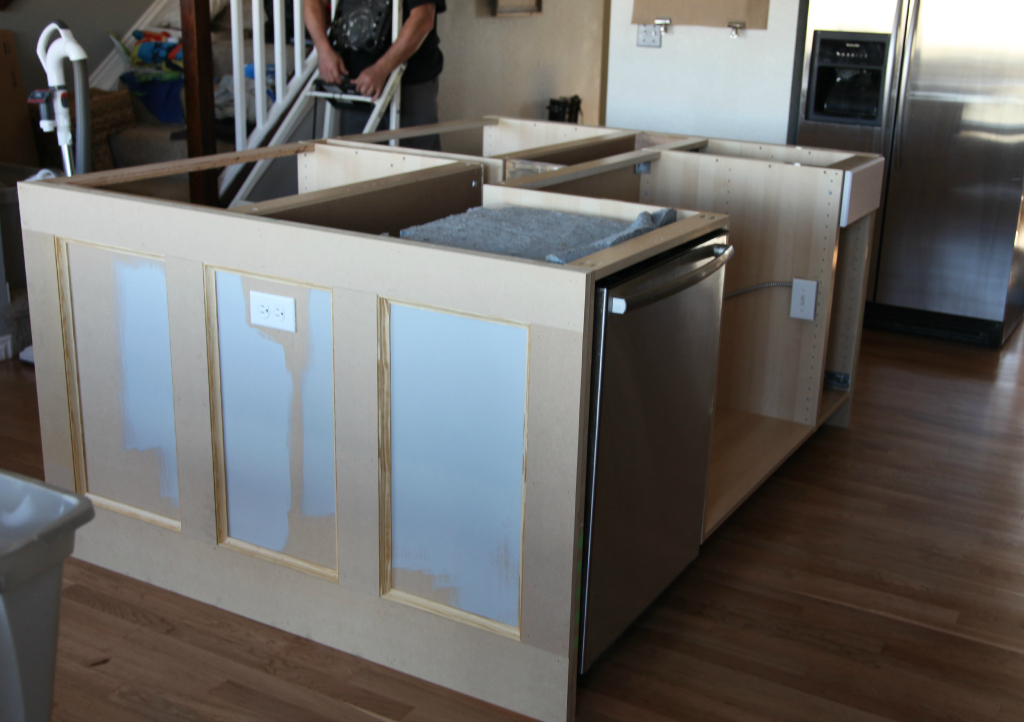
I almost never paint anything without trying out the samples in the space and really living with the choices for a few days.
I think one of the biggest mistakes anyone can make when choosing paint is to not sample them first. It is worth the time and small amount of money to see what the samples will look like in your space with your lighting.
Don’t ever rely on the paint swatches for a realistic paint color.
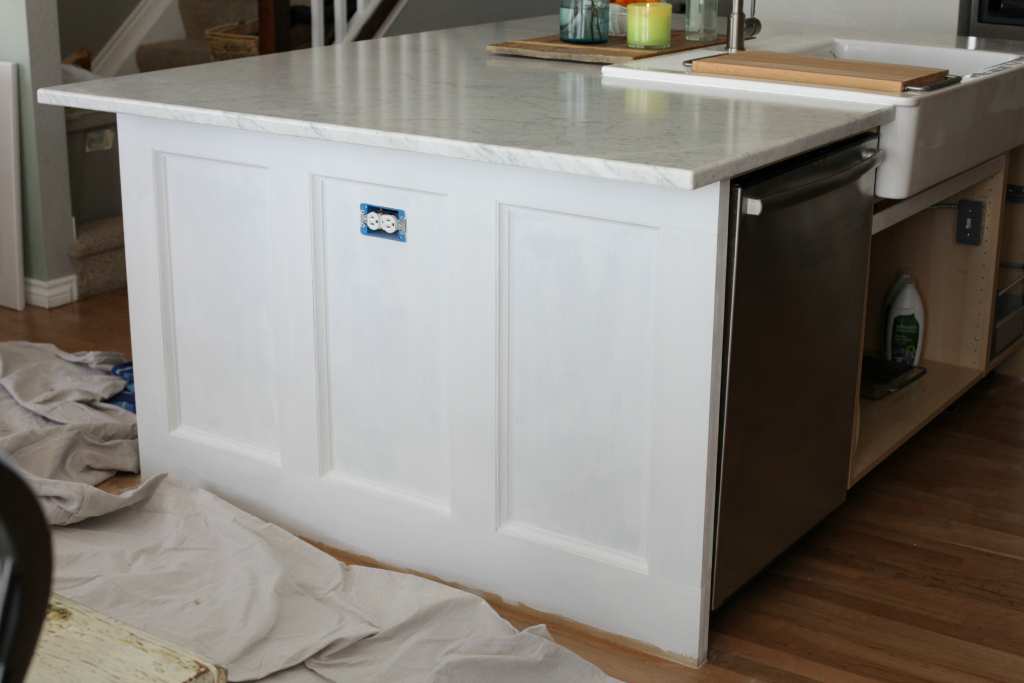
We sampled three colors for the island and we ended up choosing Fieldstone by Benjamin Moore in eggshell.
I am still so happy with our choice and the paint has held up beautifully in the space.
We primed and lightly sanded the cabinets before we painted and we even used paint with primer for a better coverage (Aura by Benjamin Moore).
We also primed all of the MDF before we painted.
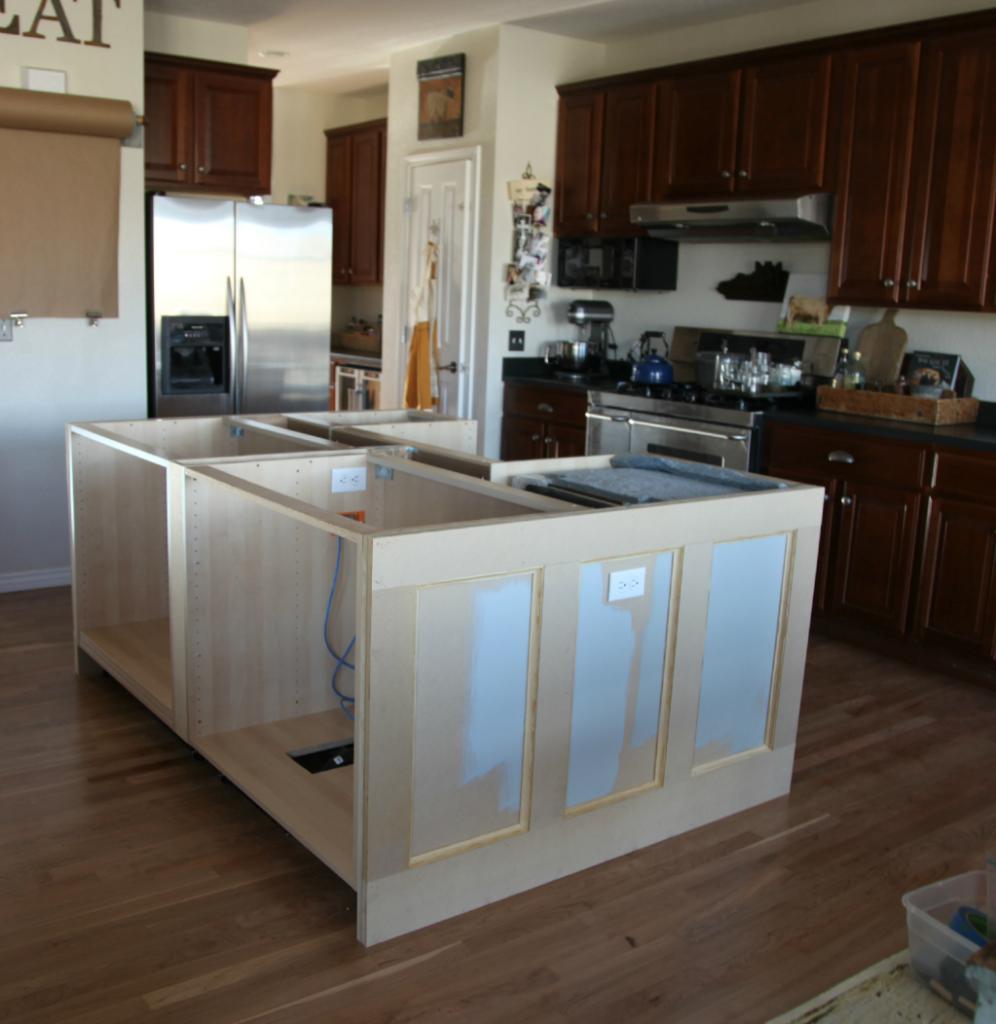
Before our Carrara marble could be installed we needed to have the island completely built and ready to paint.
At this point in the renovation we had been without water in our kitchen for a full month.
We were really excited to get the counter and sink installed and to get the water back on.
(I will have a whole other post on my thoughts on the marble and why we chose marble for the island)
Our marble was dropped and chipped the first time they came but here they are bringing in our counter a few days later and it was the beginning of a six month customer service nightmare that has not ended.
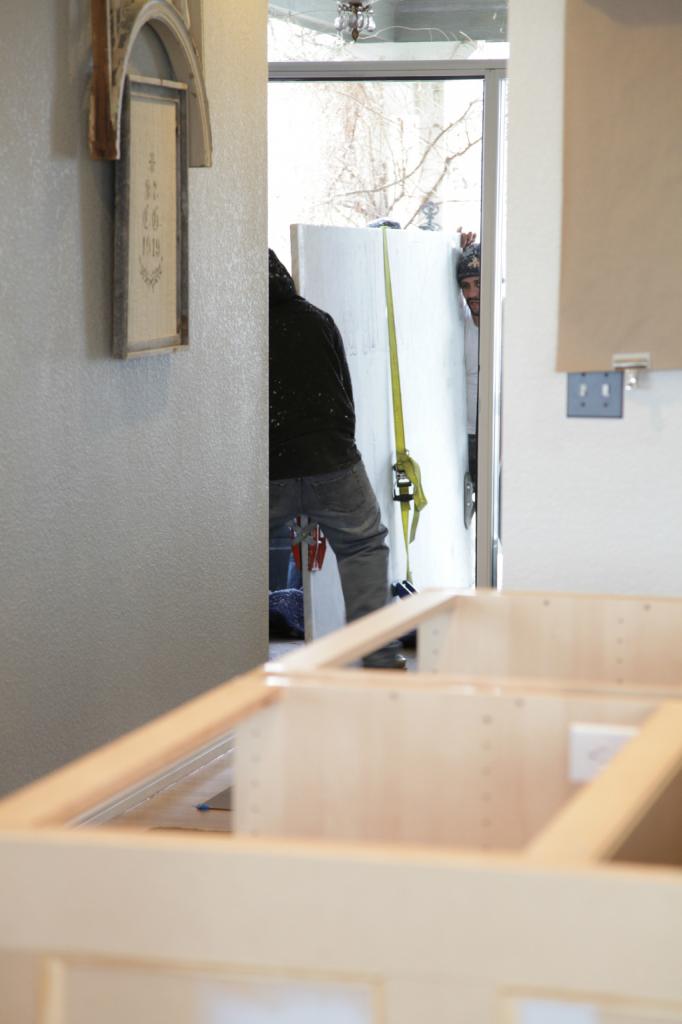
I don’t want to make this post about that experience but I do want to make sure my local friends and readers know not to use Stone City to fabricate any of your projects.
You can read my Yelp review HERE.
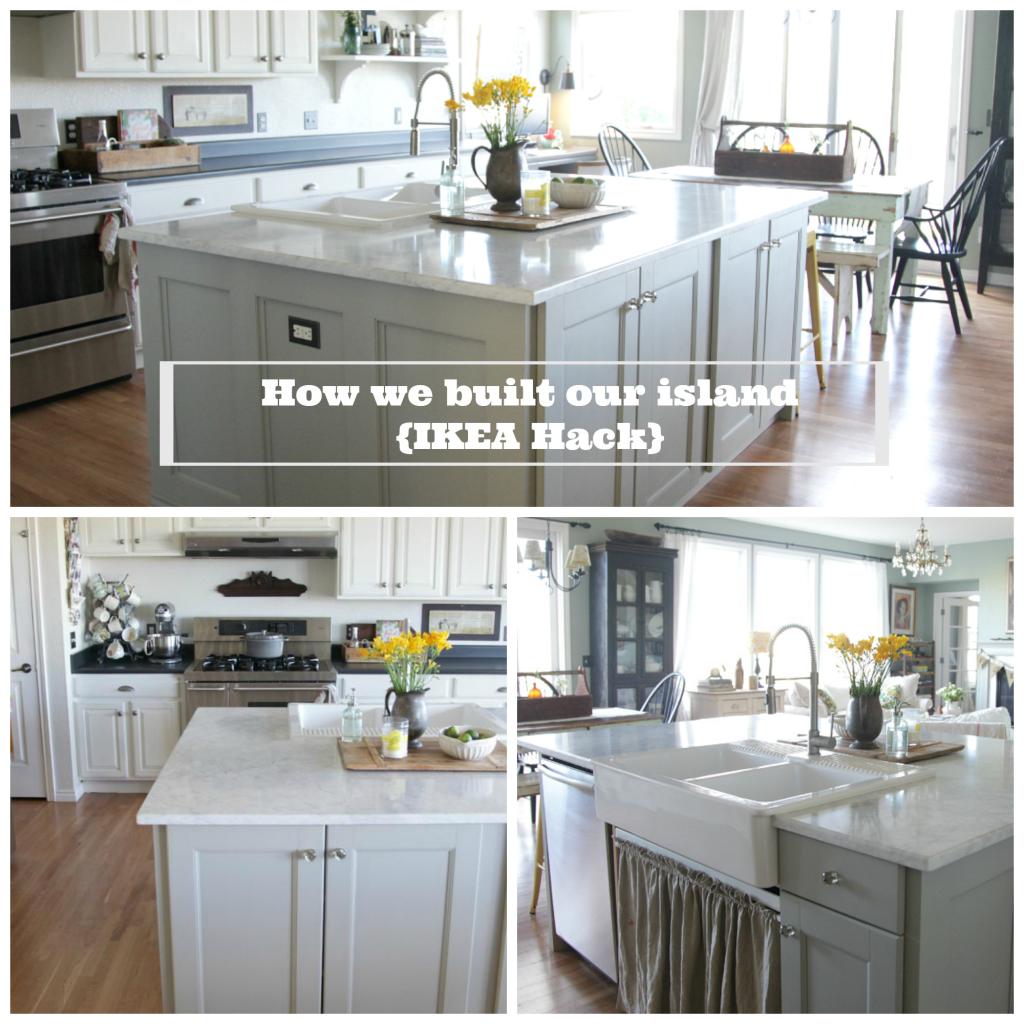
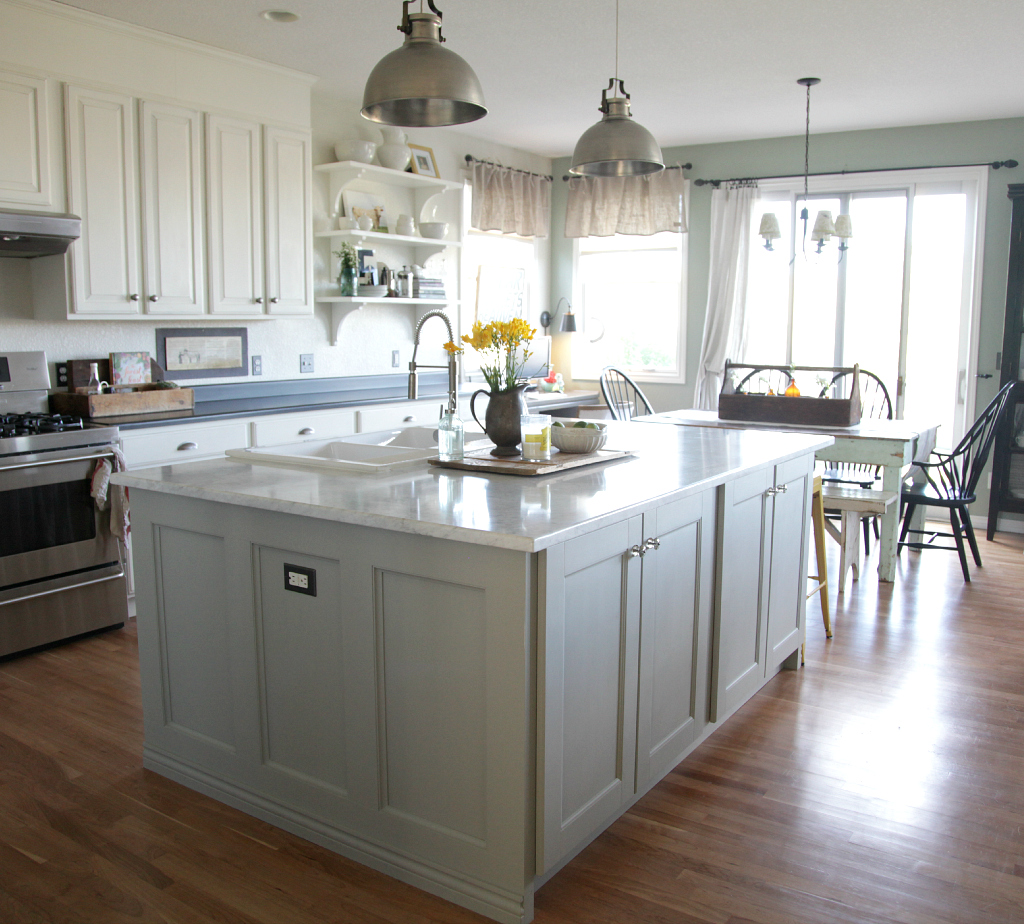
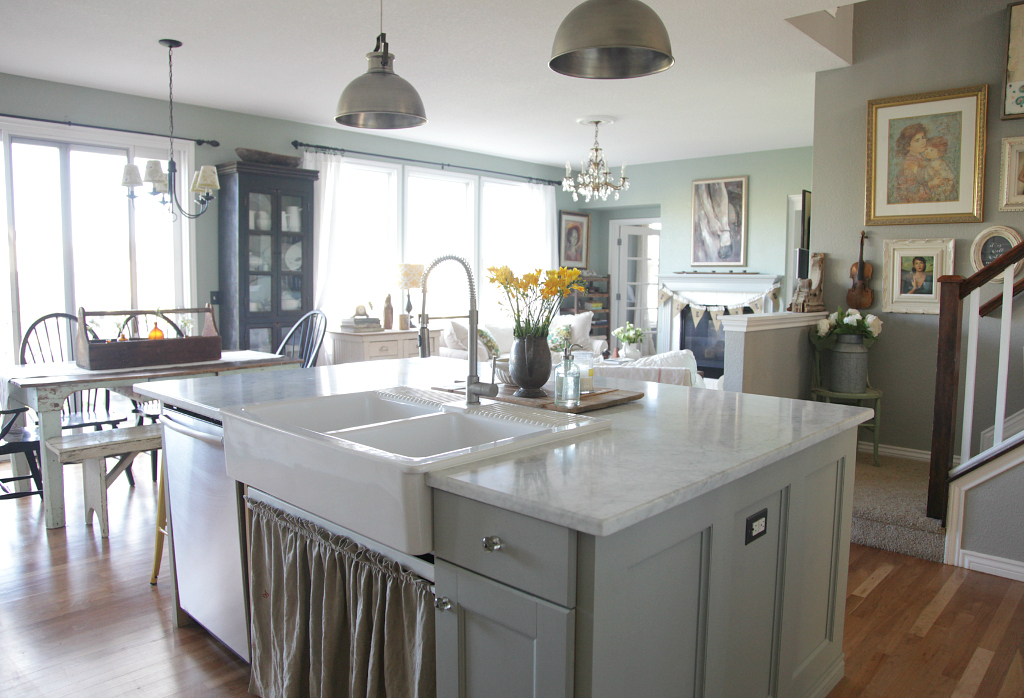
{FINISHED}
I still can’t believe that we really did this!
There isn’t a day that goes by that I don’t find the new island so beautiful and functional.
It was so much work and it was hard to not have our kitchen for a month but I would do it again in a second to have this result.
Resources:
2 Akurum 36″ base cabinets in birch
1 Akurum 15″ base cabinets with upper drawer in birch
1 Akurum 36″ base sink cabinet in birch
All of our doors and drawers are Ramsjo in primed wood (white) so they could be painted
Glass handles from Hobby Lobby
Fieldstone paint by Benjamin Moore
Faucet by Home Depot (we will be changing it out because it does not reach far enough)
Apron sink from IKEA
Vintage grain sack used for a curtain in place of doors from French Larkspur
Yellow metal stools from Target
You may enjoy these recent posts about our remodel:
*Ripping out the built in desk
*Kitchen Remodel {before and after}
What a difference! You did such a beautiful job on the design and execution of this island!
Wow you did an awesome job!!!
This is so amazing and clever, Jeanne. What wonderful husband and brother you have! I have been enjoying seeing you transform your kitchen. Thanks so much for sharing.
What a fresh improvement! I love the open space and your colors. Could you show us the yellow stools? I’m starting a renovation on a house we bought and I’m stuck already. There are lots of decisions and planning in making changes like this. Congratulations!
So fabulous! Even though our kitchen is in great condition this makes me want to rip it all out and update! Thank you for sharing!
I’m finding this ten years later and want to do the same thing. A decade on are you still happy with the results? Has it held up well?
Hello! We have not lived in the home for 9 years but I saw it a few years ago and it still was holding up great!
Hello! Question for you regarding your island. Did you need to put anything below the marble before placing it on the cabinets?
Thanks!
The island was all of the support. There was support under the marble for the whole thing. It was not just outside support. Otherwise, nothing else was placed on top of the cabinets before the marble was in place. Thanks.
Noting that the sink is meant to go against a wall and not on island I am preparing to do the same as you. Did you just use silicone to seal the back?
Wow. You all did an amazing job! How do you like the IKEA apron sink? I was unable to find many reviews and was wondering about the quality.
Thank you
We no longer live at that home but I LOVED it while we were there. Highly recommend it.
I wish you would show us where the Microwave is.
We don’t use a microwave much. In fact, I don’t use it at all and my husband is the only one that occasionally does. It is not a big part of our daily life so it was in a cabinet facing the living room. Thanks! Hope that helps.
Hi there! Awesome job…love how you though outside the box! We just bought a larger house for our ever growing family of now 7 and would love to rip of the awkward island that’s in it and build something more to our liking but amongst other improvements this house needs…….we are trying to stay on a budget! I’d love to save where we can and an IKEA just opened 5min down the rd from me!!! score!! I was curious how much this project cost you mins the sink and appliances! Trying to get a feel for if it’s worth paying someone or doing it ourselves! THanks so much.
Mallory, I am so glad you liked this project. We used marble so your hard surfaces will change the price a lot. This was enough years ago that the only price I remember is the marble and it was a lot:-) Sorry I don’t remember the budget. Good luck on your own project!
Hi Jeanne, I found your awesome island project on Pinterest. How many years did you live with the farm sink? Did it scratch or get black marks from your pots & pans?
Thank you! We had that sink for two years and I love it! I did not have black marks but I did only have it for two years. I hope that helps.
hi, did you attach the cabinets to the floor in some way? I’m trying to avoid that because I have porcelain tile that I dont want to drill thru.
Camilo,
Yes, we ran wood screws through the plastic IKEA legs. These were then later covered by the wood baseboards. Thanks!
Is it possible for you to post the measurement of the island (length and width)?
Victoria, we are no longer in this home and if the measurements are not listed I am so sorry to say that I no longer have them. So sorry!
Were your existing cabinets in the kitchen also from ikea? Or were they a different brand? We’re thinking of redoing our island with ikea cabinets but not sure if it’ll look awkward with the existing cabinets. Thank you
No, our existing cabinets were solid cherry cabinets on the wall. The cabinets that we added to the island were IKEA. I hope that helps.
Hi Jeanne, I love your kitchen island makeover! I have a similar set up in my kitchen, and had a question about the sink and dishwasher plumbing. Since your original island was on an angle did you have to move any of the plumbing in the floor to accommodate to new sink and dishwasher location? My husband and I like to DIY but not when it comes to moving plumbing. Just trying to imagine all possible scenarios before we take on this project. Thanks for sharing!
Yes, my husband did that. It would be super easy for a plumber (my husband is not and it was not a hard project). Hope that helps.
This is awesome. How big is your island?
Did you get all the cabinets at IKEA along with the doors wer are doing a island at our house and trying to get ideas
Yes. The wall cabinets were not from IKEA but all island doors were from IKEA.
Hi Jeanne, curious on the sides of the island what y’all used for the MDF accent? It looks like there’s some small type of finish within the shaker-style rectangles on each of the pieces at both ends of the island. Going through a kitchen reno and trying to replicate that little finishing touch. Thanks!
It was concave molding. It is called cove moulding. I hope that helps.
Was the electrical part easy or pretty difficult. My hubs and I are Putting in an island and I would Love to be able to put an outlet somewhere on it but we don’t know many electricians. I was Just wondering if this was even possible for him to try to look up how to do it or not? Please let me know when you get a chance. Thanks so much! By the way I love Your new island! Absolutely beautiful!!
Hello. We did this island over 8 years ago and we hired an electrician to do everything electrical. It wasn’t expensive and definitely worth it.
Impressed 🙂 We have bought a new house, and I am also preparing to paint my new kitchen. Thanks for the inspiration 🙂